The Playroom Reveal
Last Updated on March 3, 2022
 Are you excited? You should be! It's time for another reveal. This time, it is the living room turned playroom reveal. Let's start by reviewing what this room looked like when we moved in, shall we? Only two words come to mind…BORING and DEPRESSING.
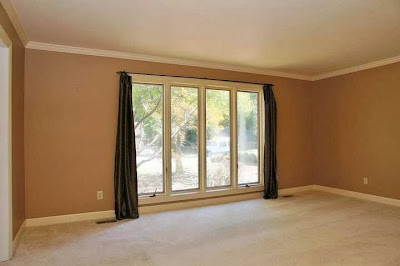

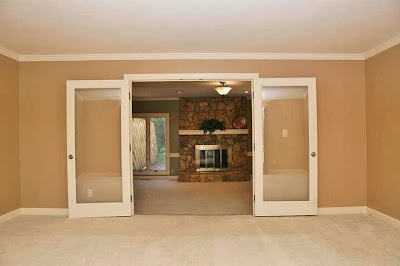
As I explain a bit on the Tour My Home page, we are not a family that has a need or a desire for a “fancy room,” which is what this room is intended to be. But, we are a family that had a strong desire for a dedicated playroom. When we viewed the house, I knew this room would be perfect for our twin girls' playroom. It has FABULOUSLY large casement windows and tons of wonderful natural light, which I feel is ideal for a playroom. I also love that it has glass french doors that open to our family room. LOVE that layout. (Note that ugly, outdated fireplace you can see in the family room is now GONE. Stay tuned for the family room reveal :) I purposely avoided any “after” shots of the playroom that revealed part of the family room. You'll just have to wait!) UPDATE: THE FAMILY ROOM REVEAL IS COMPLETE. CLICK HERE FOR DETAILS!
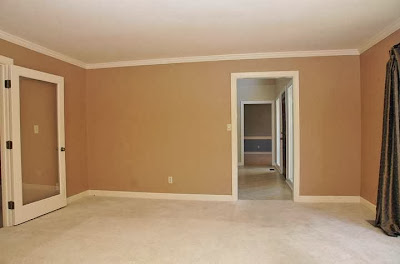
It is not totally ideal that the room can been seen from the foyer. I mean, a playroom is probably not the first room you want anyone to see. But, none of our friends, family or other visitors are the stuffy type, so exposing our playroom to visitors was just fine by us. Plus, it gives the girls, who were potty training shortly after we moved in, quick and easy access to the downstairs powder room. (If you want to check out the first floor floor plan, you can see it by clicking on the Tour My Home page).
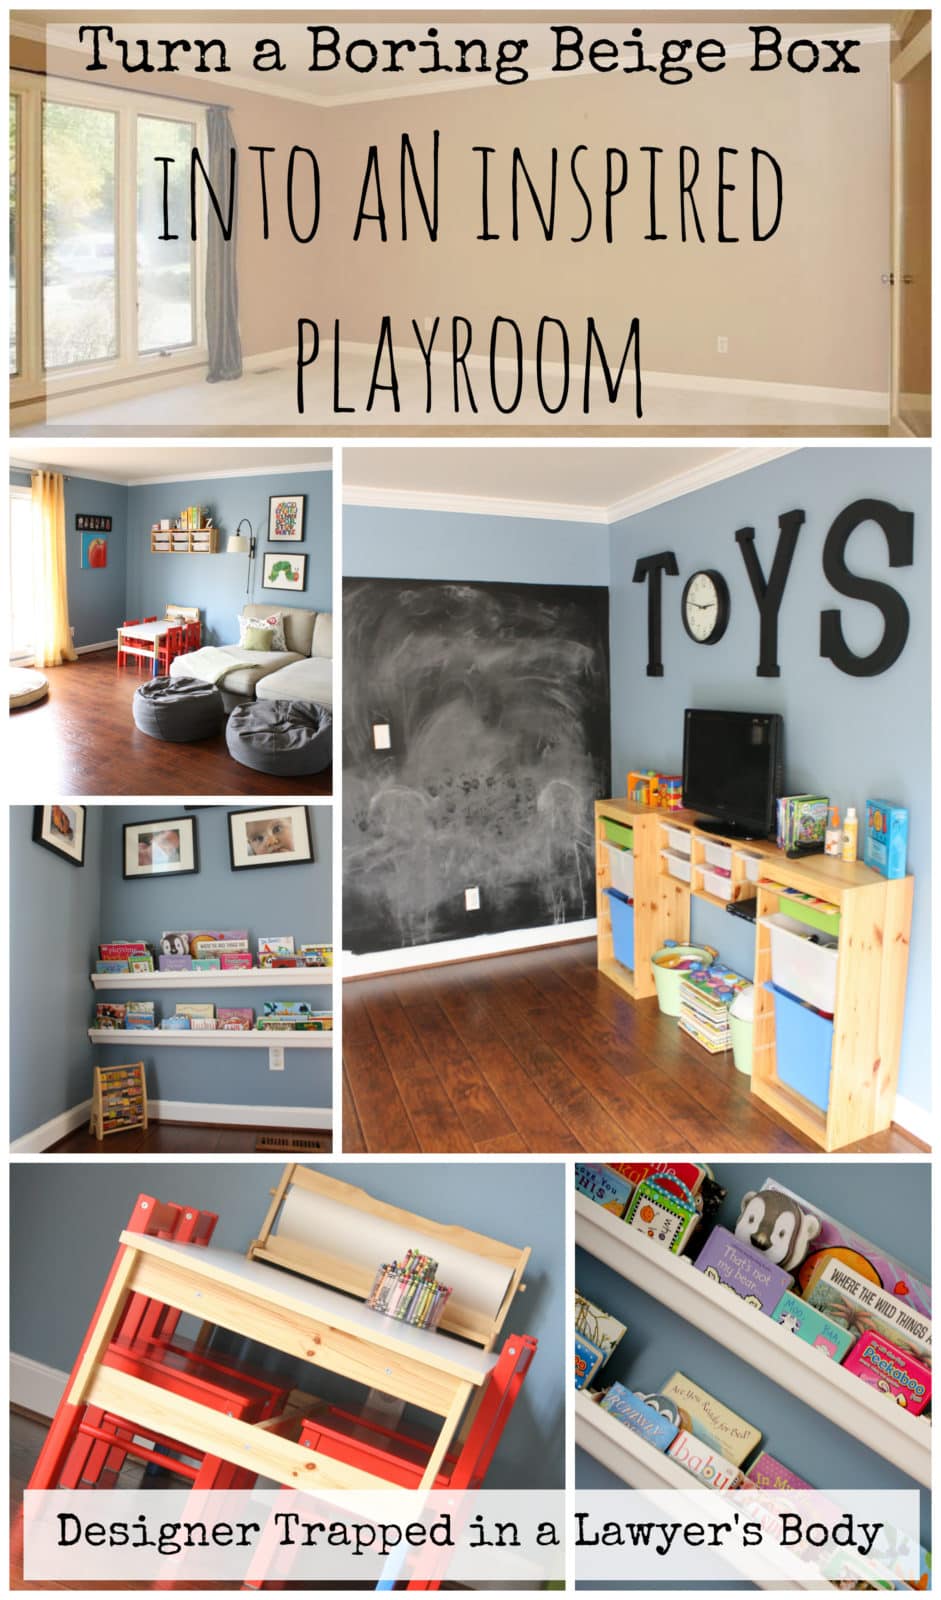
To make it over, I knew we would have to get rid of the baby poop brown walls and the dingy carpet. And we did all of that. But before I show you how we got there, let me share with you the glorious results!!!


Now for the details. Phase 1 consisted of painting the walls a gorgeous blue color and hanging golden yellow grommet curtains. We also painted the trim a true white, a nice change from the dated taupe/beige color that it was previously. Joe also changed all of the electrical outlets and light switches from almond to white–it's shocking what a difference such a small change can make.
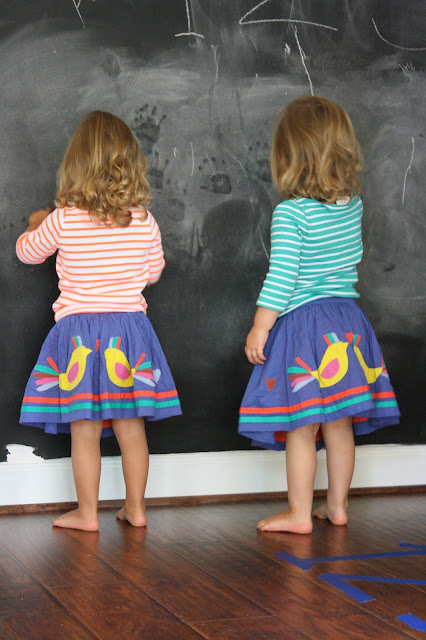
I painted the wall to the right of the french doors with magnetic primer and then with a chalkboard top coat, which the girls love. DISCLAIMER: If I had it to do over again, I would have skipped the magnetic primer. It was messy and can barely hold a magnetic letter. Definitely not worth the time or effort, but it was a good idea in theory.
As for the furniture, we already had the chaise lounges. We chose chaise lounges because we find them to be more comfy for snuggling up and reading with the girls or watching movies than a traditional couch. We also already had the Trofast storage system from Ikea, which is amazing and reasonably priced. The little table and chairs also came from Ikea. The bookshelves are made from rain gutters–a project to be featured in another post sometime in the future. The bean bag chairs are from The Land of Nod {affiliate link below*} They are FABULOUS because the covers are removable and washable.
 – 30 Grey Personalized Bean Bag
(includes Cover and Insert)
Free embroidered personalization ” width=”435″ height=”435″ border=”0″>
To add some interest to the walls without spending a fortune, I ordered a set of 12 Eric Carle Decorative Prints {*affiliate link}  and framed 4 of them.

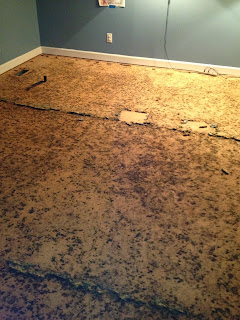
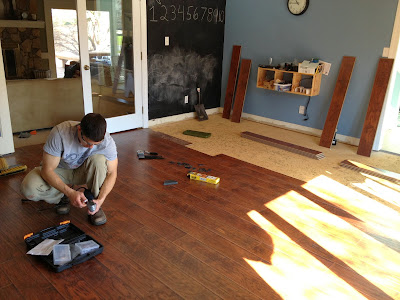
Phase 2 (which took place several months after phase 1) consisted of tearing out the nasty carpet and replaced it with the MOST GORGEOUS hand-scraped laminate (yep, laminate) floors I have ever seen. A huge thanks to Sarah at The Yellow Cape Cod for turning me on to these floors. They are amazing in quality and price. More details on the floors and the installation and finishing process coming soon.
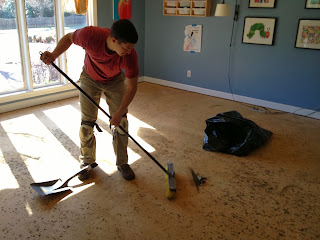
As many of you DIYers already know, the “getting there” process can be pretty darn ugly and messy, but it's important to show the process. The wonderful, handsome, handy man you see in the photos is my Joe :) You can see how gross the floor looked after we ripped out the carpet and the padding.
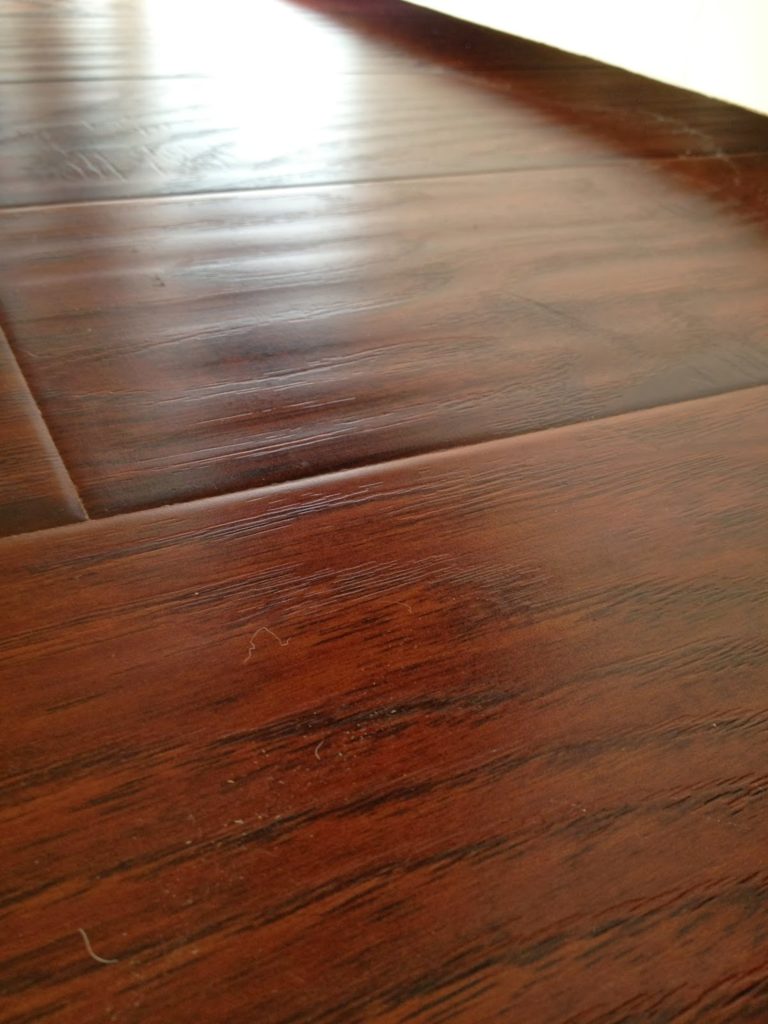
Just look at these GORGEOUS floors up close. I bet you can't wait to hear more about them?! Check back or follow me so that you do not miss that post!
How about a few side-by-side comparisons?


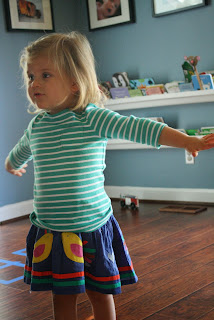
And now two more photos, because I cannot help but show you a photo of Attley and Avery actually USING their wonderful space.

So, what do you think?
* This post contains affiliate links, which means I may receive a (very) small commission if you click a link and purchase something. It does NOT result in additional charges to you or cost you anything extra. The small amount of affiliate money I earn per month is how I pay the fees to keep this site up and running. Thanks so much for your support!
I am thrilled to report that this playroom reveal was featured on:


[mv_create 1 11 200 2016 key=”1″ type=”list” title=”Most Popular Projects” thumbnail=”<a href=” https designertrapped com wp content uploads diy home decor projects blog jpg a]
From some of the pics it looks like you might have a Boxer. Any issues with the dogs nails scratching the laminate flooring? We are considering this for our basement, but have a Boxer and our wood flooring on the main level is pretty scratched up. Thanks!
We do have a big boxer! Titan walks all over our floors all day long and we have had no issues! Thanks for reading :)
What is the name/brand of paint that you used?
Hi Jessica! It’s Nostalgia by Valspar.
I love the wall color! Do you mind sharing what color/brand you used?
Thank you Hillary! The wall color is Nostalgia by Valspar!
Thanks for sharing your remodel. It looks great. Could you please tell me what size letters and clock you purchased to spell out Toys? Thank you.
Thank you, Catherine! We used 23.5″ letters–you can find them here:http://amzn.to/1h2m49i. I am not sure what size the clock is–maybe 15″. I hope that helps!
HI Tasha,
Could you please share the wall paint color information?
I love this blue and would like to use the same color on my son’s bedroom.
You have a lovely blog.
Thanks so much Divya! The color is called Nostalgia by Valspar, which you can purchase at Lowe’s Home Improvement. Thanks so much for reading my blog!
Hi
I recently discovered your wonderful blog.
Am a big fan now.
I love the wall color in the toy room.
Could you please share the name of the paint color?
Thanks,
Divya.
Thank you, Divya! The color is Nostalgia by Valspar {purchased at Lowe’s}. Hope that helps1
Love the floors! Have you done a follow up on them or can you share where I can get info on them? ?
Hi Kristi! Thanks! I STILL haven’t done a follow-up post on the floors, but I am happy to share the info with you. We purchased them at Sam’s Club. They are made by Select Surfaces and the color is Canyon Oak. I hope that helps!
I love this post and your entire blog. Thank you for the paint color and the flooring information. I need to replace my dead carpet but I am on a very tight budget. I can’t wait to price the flooring. Since it is from Sam’s, maybe I can purchase a little at a time. Thank you again.
That is what we have been doing, Debra! We have purchased the flooring for one room at a time so that we don’t blow our budget along the way!
Hello! Adorable Room! Where did you get the wall mounted book racks? Thanks!
Thank you, Kimberly! We actually made those out of plastic rain gutters. It was pre-blog so I don’t have a tutorial for it, sorry!
Cute room! Where did you get those bean bags? I’m looking for some just like that. Thanks!
Hi Shawnna! I purchased them at Land of Nod–I have included a short link for you: http://shrsl.com/?~6osx. They are awesome! Best of all, they are washable. And they are 15% off right now!
I can’t find the follow up post about your floors. What and where are they? I’m using a lot of these ideas for my new playroom. Thanks,
Hollie
Oh goodness, Hollie! I am so sorry. I never got around to that post :( But, I can tell you that the floors are made by Select Surfaces and they are the Canyon Oak color. We have been SO impressed with them. They are holding up perfectly. You can purchase them at Sam’s Club. They are an incredible value! Hope that helps.
Love the transformation. And your blog name is hilarious!
Found you via the Whimsy Link Party.
Xo,
Anjana.
Hi Anjana! Thank you–I love the name of your blog, too!
What an adorable room! I have twin daughters as well—totally random question—where are those gorgeous skirts from that they’re wearing? Thanks!
Hi Anna! Thank you :) YAY for twin girls! Aren’t they so much fun? How old are yours? Those skirts came from Mini Boden. I rarely shop there, but I got those skirts for 60% off!
How cute and fun! SO many good ideas! Pinning! :)
Thank you so much, Jillian! I cannot believe you have TRIPLETS! My twin girls are wonderful, but goodness, I can’t imagine having a third one at the same time. My hats off to you! I look forward to getting to know your blog better and following you on Pinterest!
hi! love your chalkboard wall! have you found the chalk dust to be a problem? we have a carpeted play room and would love a chalk board wall!
Hello, Sarah! No, we have not found the dust to be a problem at all. Every once in a while when an eraser falls on the floor, we have some dust to wipe up, but it’s not bad at all!
Not sure how I found this playroom reveal, but I’m so glad I did. I’ve been looking for a blue that would look great with similar colored flooring in my little boy’s room. Do you remember what color and brand this blue paint is?
thank you!
Hi Katie! I will double-check tomorrow, but I am pretty sure the color is “Nostalgia” by Valspar! So glad you found my blog also. I hope you will come back some time!
You are such an inspiration! Thank you for your blog. I own an apartment building and am ready to decorate because it doesn’t look like moving is in the plans for now. Therefore, you have to create an oasis where you are and you have given me some wonderful ideas! Also, your girls are just beautiful.
Awww! So glad you found some inspiration on my blog. That’s what it is here for! And thanks for the compliment on my sweet girls :) Have a great night!
I can’t even begin to say what I like best about the room. It is all creatively done, smart use of space and so attractive. Fantastic job! (The word ToYS with the clock is adorable.)
Thank you! I am so pleased with how the room turned out. Thank you for stopping by!
i love that bedroom.
What a wonderful transformation! My kids would have loved to have a huge chalkboard wall like this.
Thank you, Steph. The chalkboard wall is a hit :) PS- I love the name of your blog!
This room is soooo cute! i love it :) http://www.handmadeintheheartland.com
Thank you, Angela!
Thank you, Tammy! We did try to make it adult friendly and we must have succeeded because I just love spending time in this room. I still can’t believe the floors are laminate either. They are AMAZING. I am enjoying your blog as well! I look forward to all of your future posts.
I love this room! you did a great job and it looks very adult friendly too. I love the floors I can’t believe they are laminate. Just found your blog and love it.
Tammy @ thecoloreddoor.blogspot.com
Thank you, Tammy! We did try to make it adult friendly and we must have succeeded because I just love spending time in this room. I still can’t believe the floors are laminate either. They are AMAZING. I am enjoying your blog as well! I look forward to all of your future posts.
THIS ROOM OMG! I’m coming over! Oh you did so good. What a fabulous place to cultivate the imaginations of little ones. The colors, the flooring, the chalkboard wall, loving every detail! Thanks for sharing with Life Created Tuesdays!
Oh, thank you, Erin! It’s my pleasure to be part of the party. Thanks for hosting!
This space is amazing, Love how it turned out. I’ll be featuring tomorrow.
Oh my goodness, thank you, Kristin! You made my night!
What a fun playroom! Love the Toys sign and the gutter bookshelves, but it is really amazing just how much those floors transformed your room. (I hate carpet so much!) And your girls are precious. They have lots of fun hours in this room to look forward to.
Thank you for stopping by, Carrie! I totally agree about the flooring. Generally, I don’t love carpet in living spaces and the new floors warmed the space up so much!
Turned out great! Perfect for kids…your girls will enjoy this room for YEARS to come!
Thank you, Michele. I think you are right–it should grow with them for a while, at least! Thanks for stopping by. I appreciate it!
This room is darling! I love that you took what some might use as a formal living room and made it work for your family…I would have done the exact same thing. :-)
~Sarah
Thank you, Sarah! A formal living room would have served no purpose for us–we are thrilled to use this room every day as a playroom. Thanks for stopping by. I am going to check your blog out right now!
What a CUTE playroom! Love all the organized toy storage and those floors are stunning! Looks like the girls are loving it too! I popped over from The Inspiration Gallery– thanks for sharing!
~Abby =)
Hi Abby! Thank you for stopping by. These floors seriously are amazing. No one can ever believe they are laminate (and I don’t think they are faking their reaction for my benefit). I hope you’ll stop by often!
Stopping in from Made in a Day…Oh my gosh this is just the cutest room ever I love it, you did such an amazing job! Just added you to g+ , facebook, and Pinterest…I cant wait to see some of your other posts! Thank you for sharing
Sheena @ http://www.thekeeperofcheerios.blogspot.com/
Thank you so much for stopping by and for the compliments! I really appreciate it and am thrilled that you are now following me :) I LOVE the name of your blog and am going to check it out right now. Thanks again!
Hi Tasha: I’m Connie at http://hotflashncraftn.blogspot.com, I added you to g+, though I confess, after 2 years, I still have no idea how that works, I’ll also go follow you on pinterest. Anyways this room is awesome. Your children must be having a ball. Thanks for sharing.
Thank you, Connie. I love new followers! I am going to check out your blog now :)
What an AMAZING room! It’s such a bland box before. Love the personality it has now, and I adore those floors!
Thank you so much, Korrie! The floors really are amazing. I hope you check back in the future for details on the floor. I appreciate you stopping by!
This is adorable! Your girls are going to love that!
Thank you, Ila. I appreciate you stopping by. My girls are LOVING the space, which makes me so happy. And I am glad it is a room that I love as well, since I spend so much time in it :)
What a fabulous room. I love the new floors. Gorgeous. Thanks tons for linking to Inspire Me. Hugs, marty
Thank you so much, Marty! Thank YOU for hosting the wonderful party and for your kind words!
The room looks great! I love how you used the clock as the “o” in “toys.” Very clever! I can’t believe those floors are laminate! Wow! They’re gorgeous!!
Thank you, Lisa! The floors are seriously amazing. I can’t get over it–I hope you’ll check back for the post that reveals all of the specifics on the floor!
Hello Tasha,
This is a darn CUTE room…LUV IT!!! Come by on Monday and grab my starfish featured button for your blog. Yes…you will be featured at my party this week.
Blessings,
Linda
Oh my goodness, Linda–thank you so much! I already grabbed the feature button and can’t thank you enough for featuring my laundry room reveal and for your kind words on my play room reveal!
:) Tasha
Hi Tasha:
I love how the play room came out. The blue paint and the wonderful natural light from the windows has brightened the room up so much and looks very cheery. The toy caddies for easy put away are fabulous and helps teach the girls at the same time. The clock for the “O” in Toys is very clever too!! Miss having your kind of energy to do such projects. Looking forward to seeing more and thanks again for sharing.
Thanks so much, Kathy! As you know, Joe is a hard worker, too. I wouldn’t be able to do it without him!
I love this!! It has a clean look, lots of space, very organized–and I love the TOYS sign using the clock–very cute :) My husband is in law school currently–I guess you would say he’s a video gamer trapped in a lawyer’s body? ;)
Hi Gabby! Thanks so much. We really enjoy the space and I am a tad OCD, so the organization helps me stay sane :) “Gamer Trapped in a Lawyer’s Body” could be a whole other blog. I actually enjoyed law school– I hope he is! Thanks for stopping by!
Gabby, I just checked out your blog and LOVE it. I look forward to following you on Facebook, Pinterest and Google +!