DIY Pipe Desk (a.k.a. the easiest desk EVER)
Thank you to DAP Products for sponsoring this post. As always, all opinions are 100% my own based on personal experience.
Hey friends! If you are a regular reader of my blog, you know that we are in the process of shuffling all the rooms in our house around (and PS, you are awesome for being a regular reader–THANK YOU)! We need to separate our twin girls' bedrooms, which requires me to move my office into their playroom and move their playroom into a corner of our family room. A lot of shuffling! Well, I'm proud to report that we are almost done relocating their playroom into our family room. That required us to make them a new desk/art table and I love what we came up with! This DIY pipe desk is not only incredibly easy to make, it's super inexpensive. A double win! Read on to learn how to make your own. This post contains some affiliate links for your shopping convenience. Click here to read my full disclosure policy.
DIY Pipe Desk Tutorial
Materials needed for 1 pipe desk:
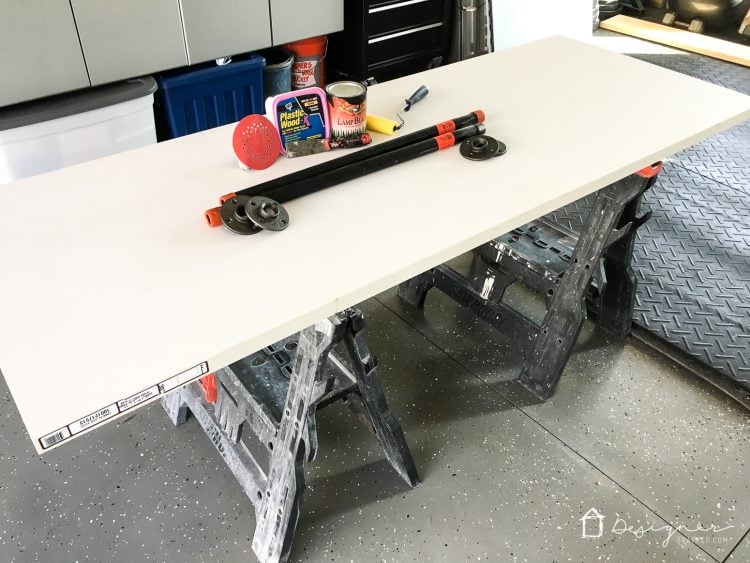
- 1 hollow core door (we used this exact door, which is 80″ x 30″). Ours cost $30, but I bet you could find one at a Habitat Restore or Goodwill for way less!
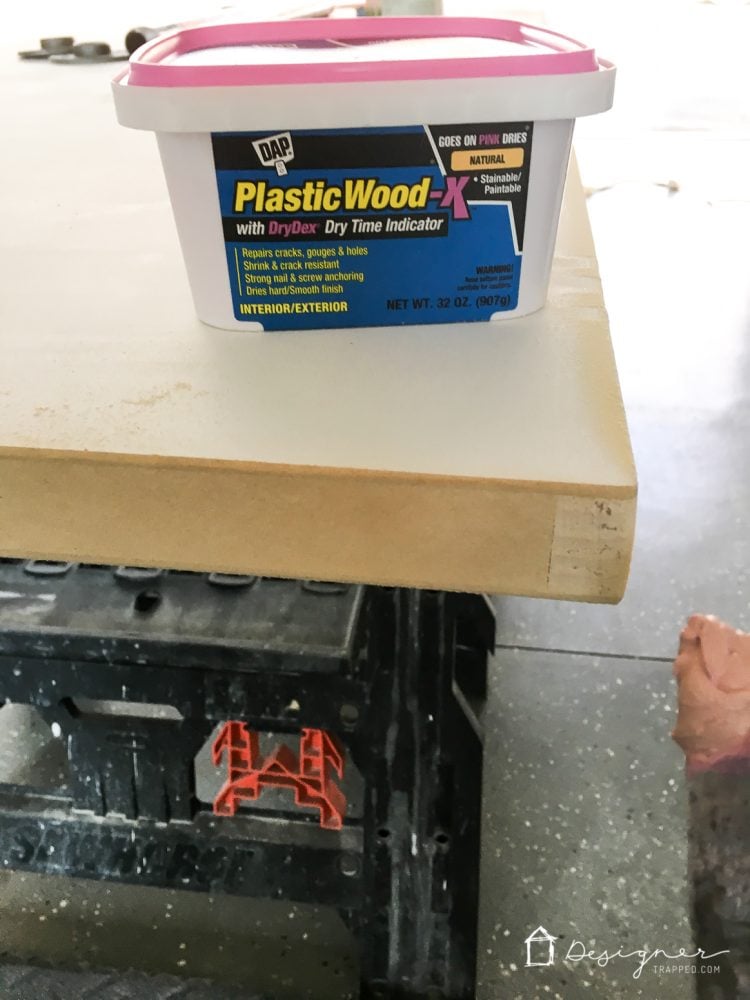
- DAP Plastic Wood-X
- Sandpaper
- Paint
- DAP Rapid Fuse
- Clamps
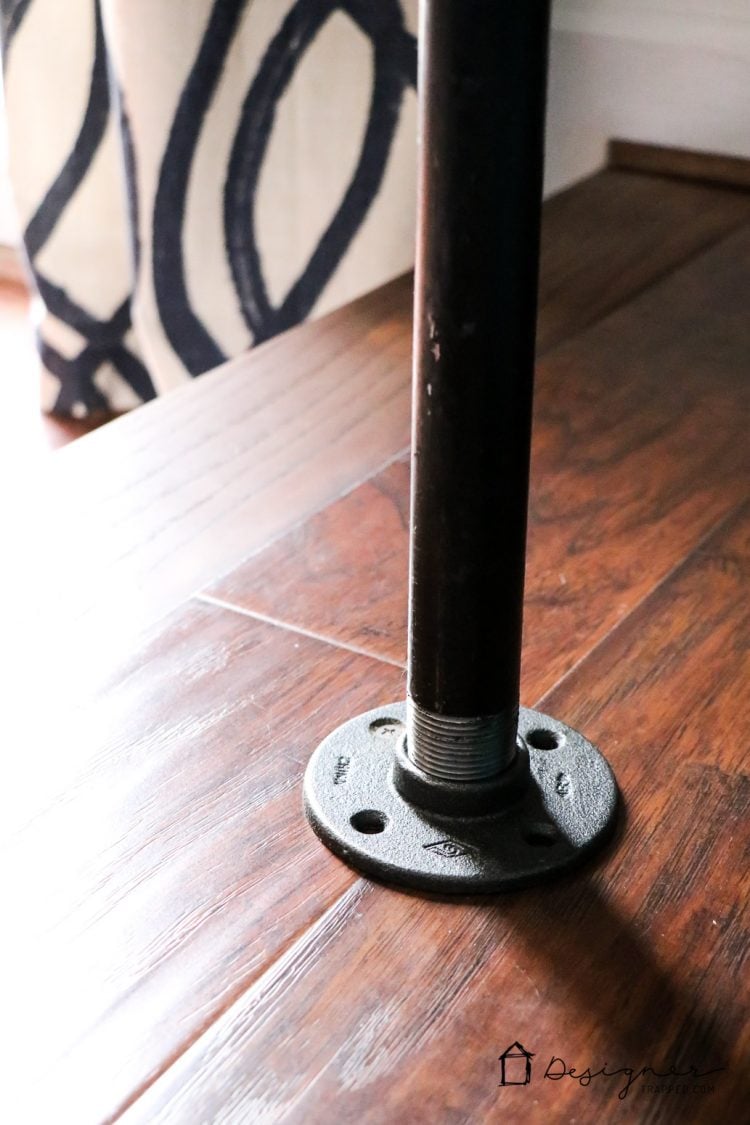
- (2) 24″ lengths of 1″ diameter steel pipe
- (4) Floor flanges
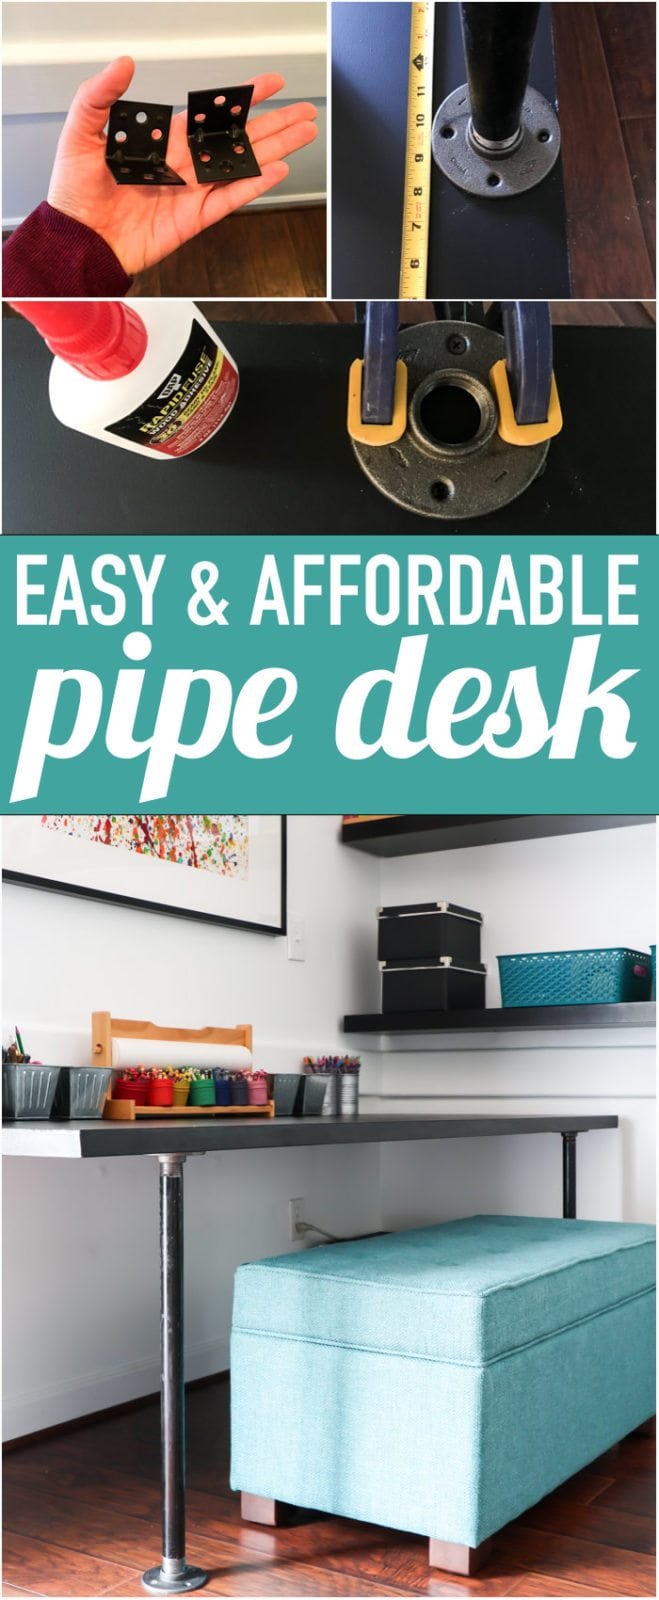
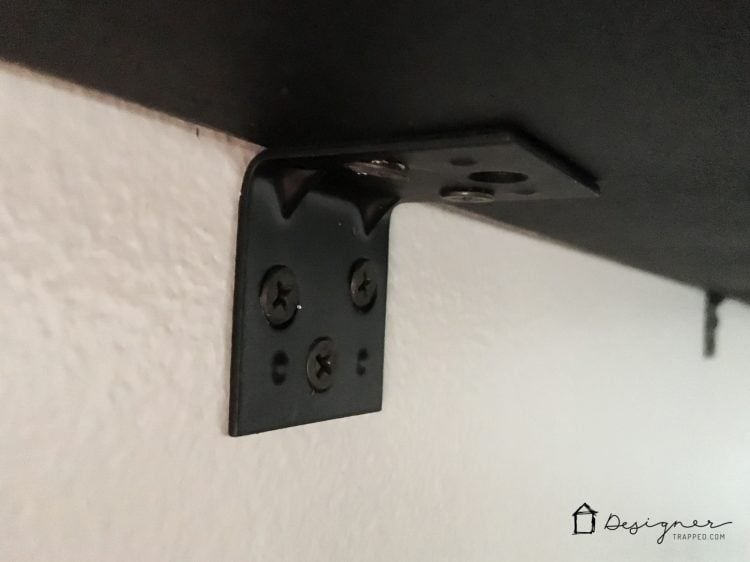
- (2) right angle brackets
Steps:
1) The edges of the hollow core door are very rough (that's what you get for $30), so we started by applying DAP Plastic Wood to the edges. After it dried, we sanded them until they were nice and smooth. Much easier and cheaper fix than buying a solid wood door for this project!
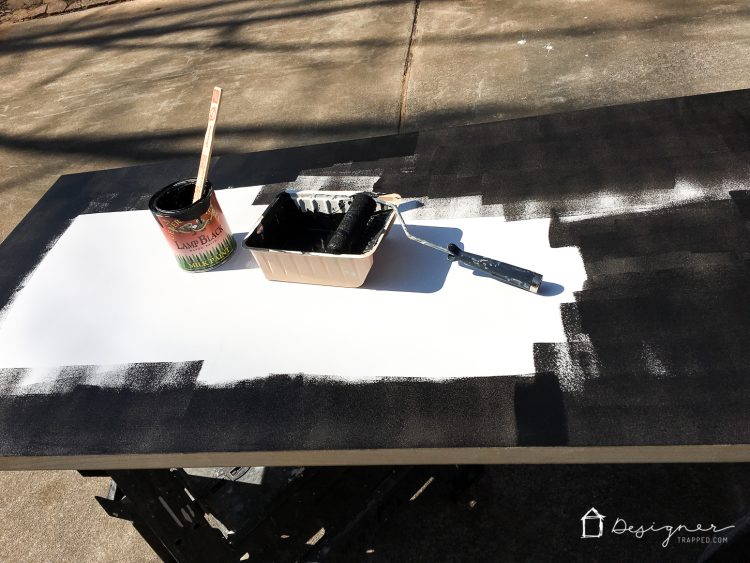
2) Next, we painted our door. We opted for black because we had already had some on hand, but you can choose any color you want!
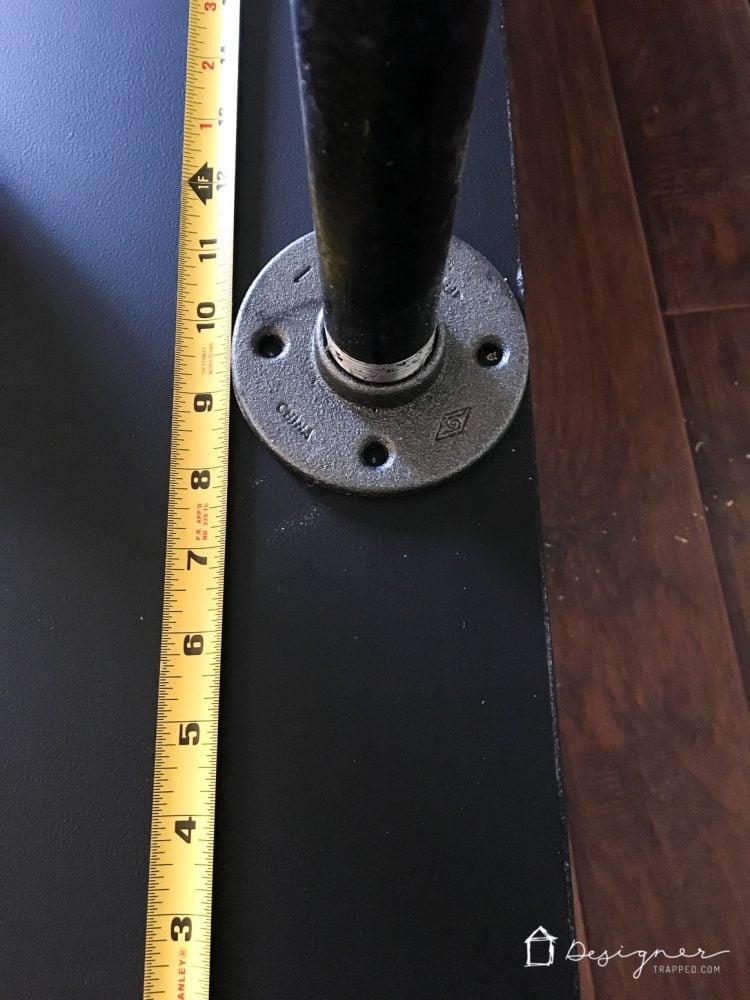
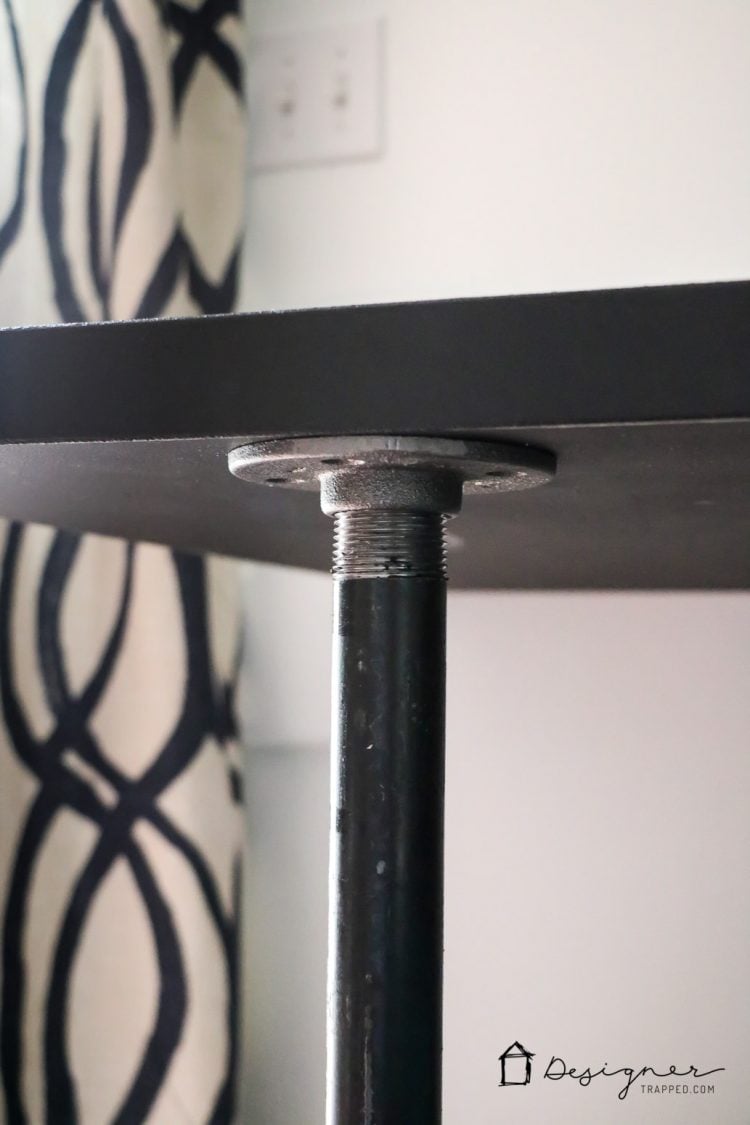
3) After the paint dried, we attached the floor flanges to the underside of the pipe desk. We started by measuring 9 1/2 inches from the edge of the desk (totally an aesthetic choice–you can place the legs wherever you want).
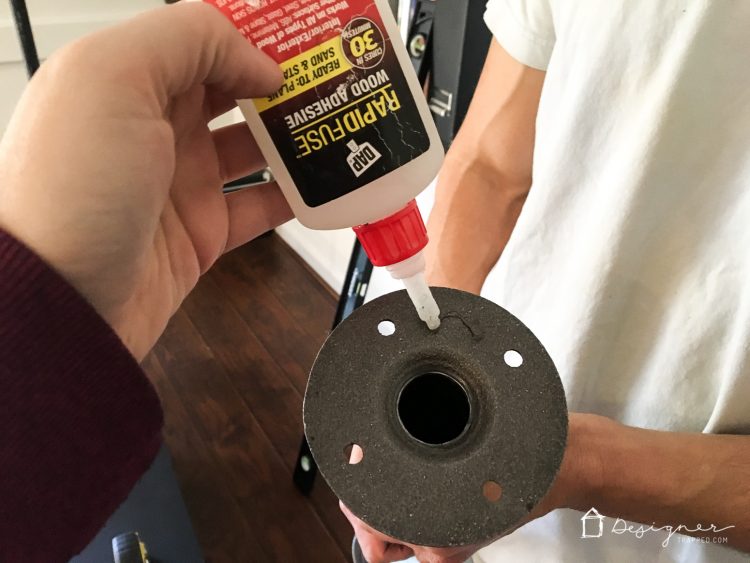
The actual “attaching” part is a bit tricky because it's a HOLLOW core door. So, only the screw at the very edge of the door will have any wood to grab onto. But having a single screw holding the floor flange into place didn't work at all. Enter DAP Rapid Fuse (a.k.a. one of my favorite inventions EVER). DAP Rapid Fuse bonds nearly all surfaces together. So, we applied Rapid Fuse to the bottom of the floor flanges and positioned them on the underside of the pipe desk. We then drove the one screw we could into place and clamped the floor flanges so they would stay nice and still while the Rapid Fuse set. If it weren't for the Rapid Fuse, we would have had to purchase a solid wood door, which would have cost over $100. Like I said, it's one of my favorite inventions ever (I've even used it to repair my shoes, which I talk about in this post).

4) After the Rapid Fuse set (worked like a charm, by the way), we screwed the 24″ pipe legs into the flanges that were attached to the pipe desk and then screwed the other two floor flanges onto the bottom of the legs.
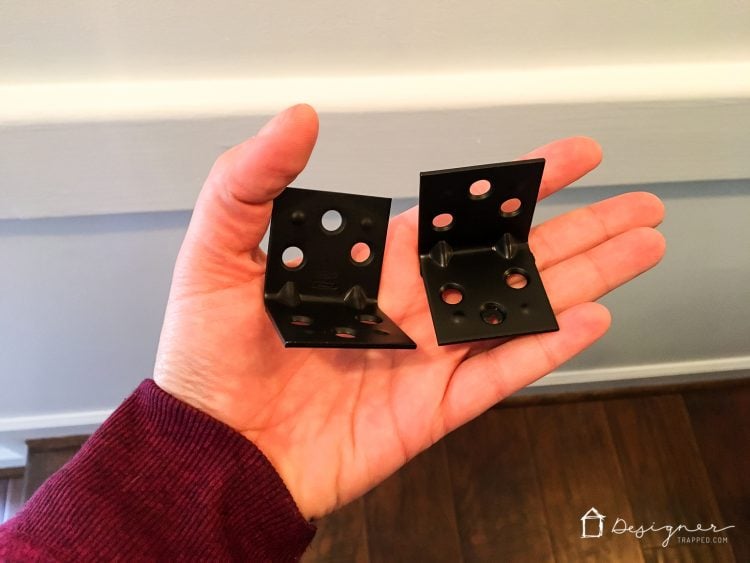
5) We then moved the desk into position and attached our angle brackets (see the photo of them below–we spray painted ours black) to the wall and to the underside of the desk. We made sure to catch wall studs, but if that's not an option for you, be sure to use appropriate wall anchors. NOTE: This is totally optional. You could just attach 2 more legs to the back of the pipe desk. But since we knew we wouldn't be moving ours around, mounting it to the wall on the back helped 1) keep the costs down and 2) gives it an even more industrial look since it looks like a built-in fixture.
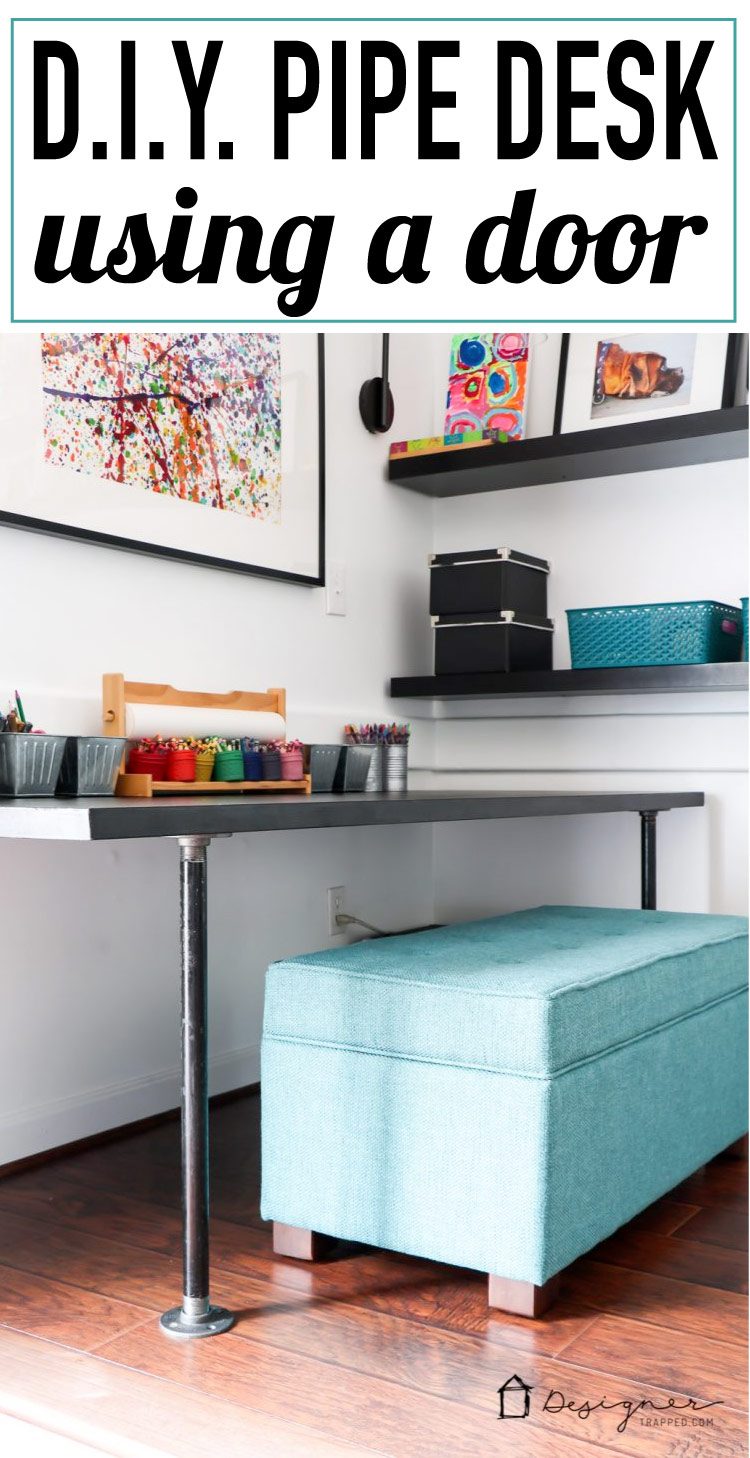
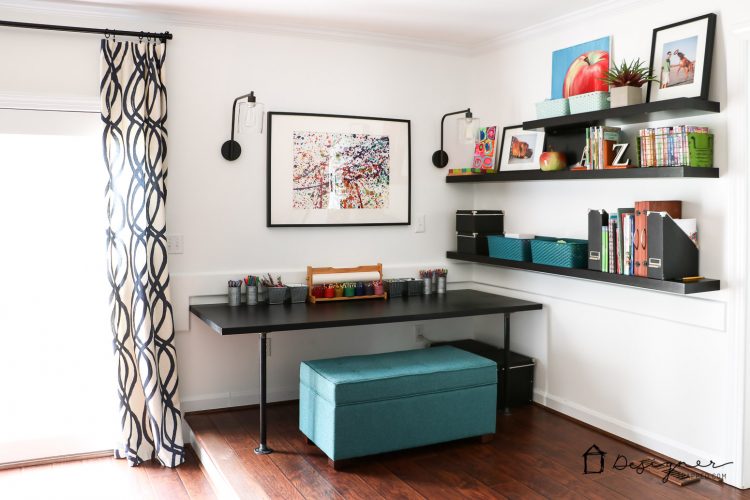
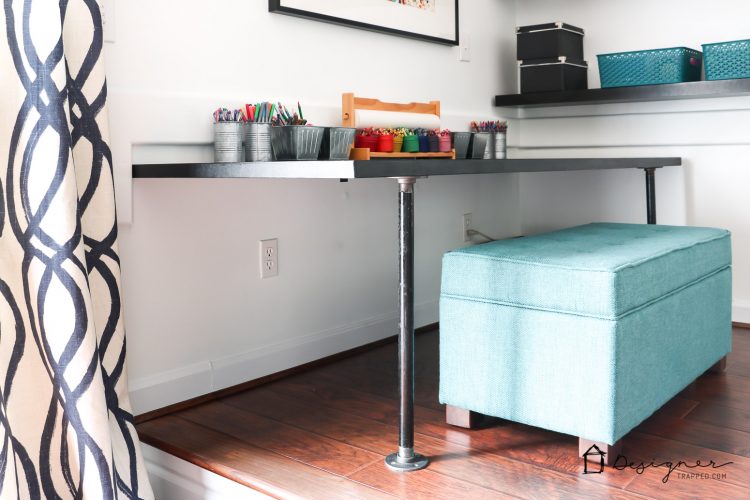
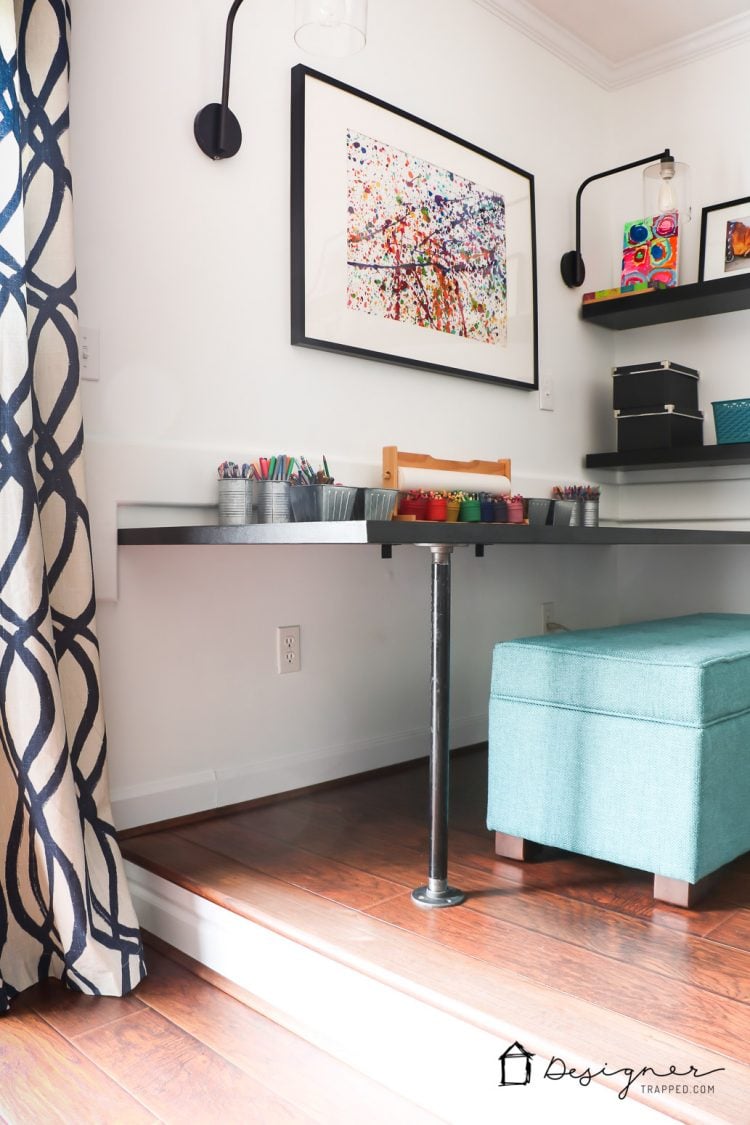
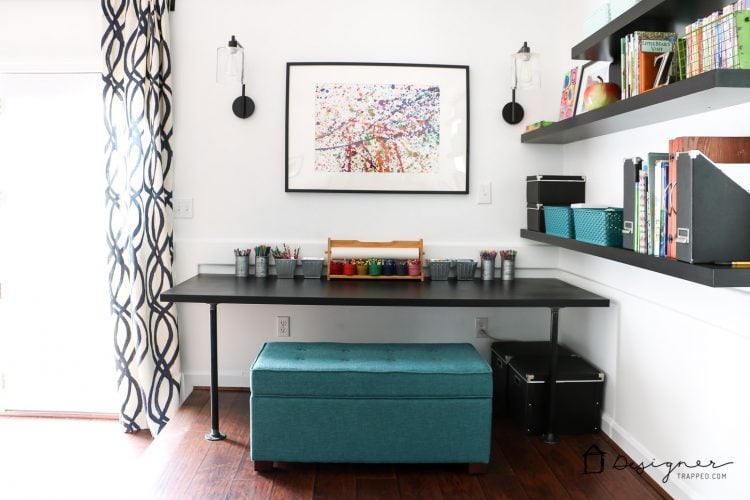
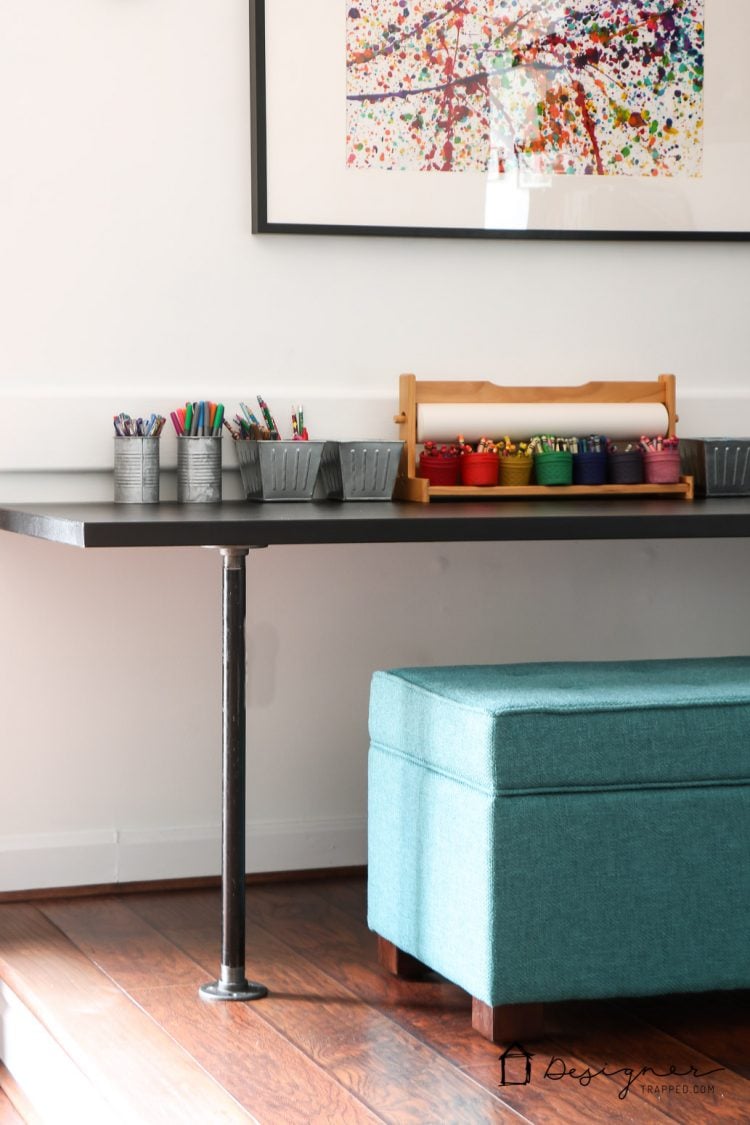
That's it! Now we have a huge, sturdy DIY pipe desk for our twin girls to use for their homework, art, puzzles, etc. It's perfect and we love that it was easy and economical! The entire project cost us only $60 and took about 1 hour to make (not including drying time for the pain and Plastic Wood-X). Check out our DIY pipe desk all finished and ready for our girls to use it!
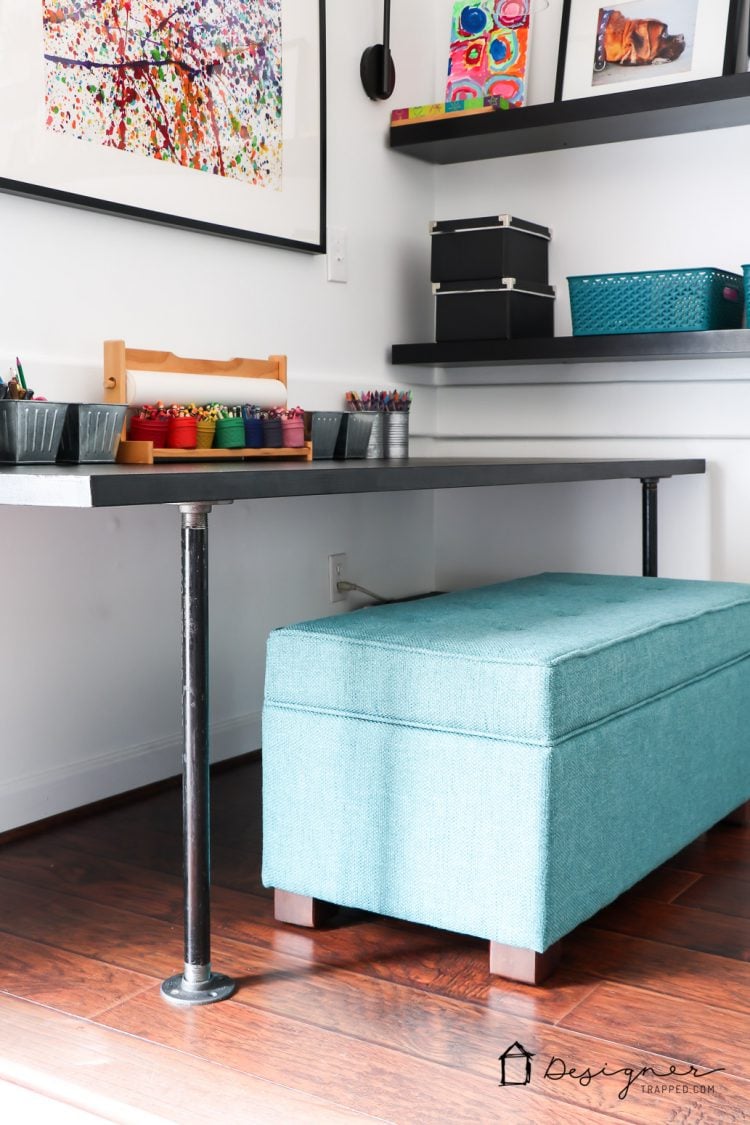
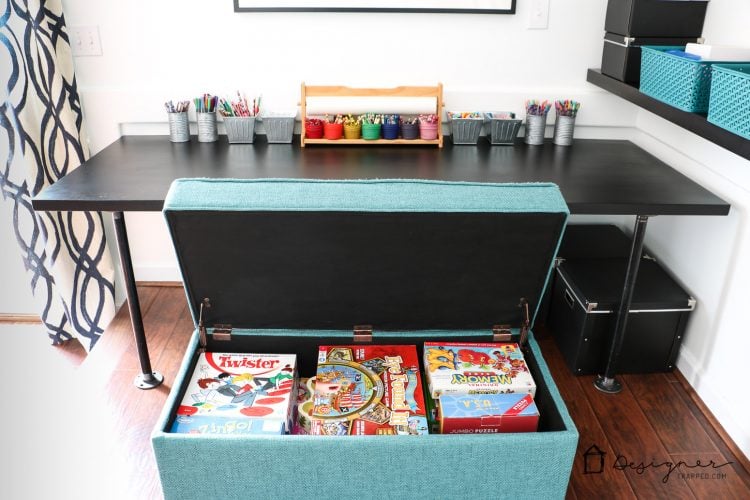
If you are wondering why we chose to pair our DIY pipe desk with a bench instead of regular chairs, THIS is the answer to your question! That bad boy has storage. Enough to fit all of our board games! Here's a link to the exact storage ottoman we bought.
My sweet Titan kept photo bombing me, so I figured I'd include a shot of him :)

And now for some details. I love the industrial look of this desk created by the pipe legs.
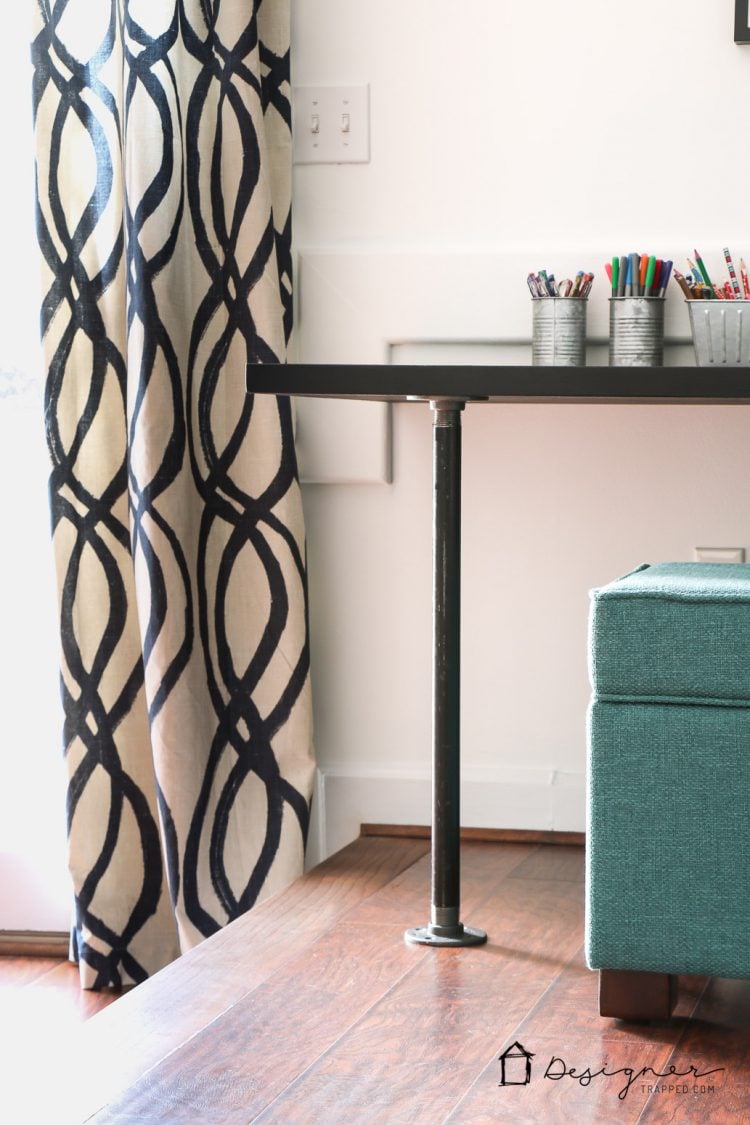
We did drill one screw into the floor since this table is going to be used by our kiddos. Safety has no holiday :)
Well, that's it friends! I'm finishing up this post just in time to go help my girls with their homework, sitting at their new desk, of course!
[mv_create 1 11 200 2016 key=”1″ type=”list” title=”Most Popular Projects” thumbnail=”<a href=” https designertrapped com wp content uploads diy home decor projects blog jpg a]
Last Updated on February 13, 2022