How to Add a Fireplace to Any Room: A Step-by-Step Tutorial
Have you ever wanted to add a fireplace to a room in your house? The good news is that it's possible even if you don't have a chimney! Electric fireplaces are a simple and cost-effective way to add warmth and ambiance to any room in your home. They are easy to install and require little maintenance, making them a popular choice for homeowners and DIY enthusiasts alike. If you are considering installing an electric fireplace, this step-by-step tutorial is for you!
This project was completed in 2018. This tutorial was fully updated in December 2023.
It seems like many newer homes these days have zero fireplaces. Gone are the days when people relied on wood-burning fireplaces for their heat and historic homes that were built with 4+ fireplaces! And even in homes with a fireplace, there is generally only one in a central location like a family room or great room.
The primary bedroom in our former home was huge and not in a good way, in my opinion. It was too big and felt cavernous. It did not feel cozy or inviting and had zero architectural interest. This is what it looked like when we moved in. It was really the size of two large primary bedrooms, so we used one half of it for sleeping and the other half as a sitting area.
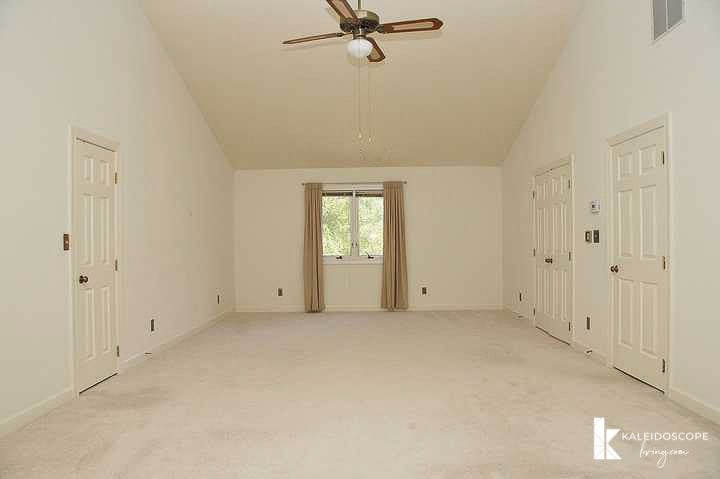
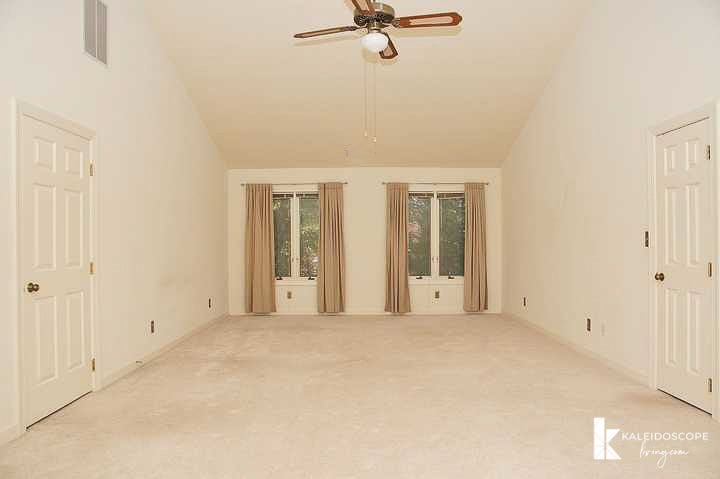
We had skylights installed for some architectural interest and to let more natural light into the space, but it still didn't feel cozy. After a lot of thought, we decided that a fireplace in the sitting area would really help. BUT there was no chimney in this space. So, what's a girl to do? Here's what our research taught us.
Options for Having a Fireplace Installed in an Existing Home
So what do you do if you don't have a fireplace where you want one? Let's take a quick look at the different options.
Option 1: Fireplace and Chimney
Well, based on my research, having a fireplace and chimney installed can cost between $2,500 to $11,000 ($6,750 on average), and that's if it's even possible based on your existing home layout. Not only that, but wood-burning fireplaces and chimneys are not inexpensive to maintain and repair. According to HomeAdvisor, “replacing the cap, liner and other repairs range from $350 to $2,150. Expect to pay up to $1,000 per year for inspection and cleaning services depending on the condition of your chimney and its total number of flues.” Yep, it's expensive.
Option 2: Gas Fireplace
Many people don't realize that you can have a ventless gas fireplace installed in a home that doesn't have a chimney. BUT they are only recommended and safe in well-ventilated rooms (think high ceilings and multiple big windows). And some areas do not allow them at all due to health and safety concerns. You can also have vented gas fireplaces installed without a chimney, but they require a venting system to be installed, which can get expensive. According to HomeAdvisor, Built-in gas fireplaces cost an average of $6,700.
When we decided we really wanted to add a fireplace to the sitting area of the primary bedroom in our old home, we were on a tight budget, so neither of those were viable options for us. Instead, we went with option 3…
Option 3: Electric Fireplace
We learned that you can install an electric fireplace in any room without venting it to the outside. It's definitely worth confirming that your local building code allows it, but it seems that in most places, you can place an electric fireplace pretty much anywhere that you have an outlet and the space for it. The best part is that because there is no complicated venting or complex skill required, installing an electric fireplace is DIY-friendly. So if you are willing to do the installation work yourself, it's an incredibly affordable option as well. Read on to learn exactly what steps to follow to install an electric fireplace in your own home!
This post contains affiliate links for your convenience. Click here for my full disclosure policy.
DIY TUTORIAL: How to Install an Electric Fireplace in Any Room
Video Overview
I recommend that you watch the short video below for an overview of this DIY electric fireplace installation before reading the instructions.
Step-by-Step Instructions
Time needed: 2 days
We completed this entire project in a weekend. If you choose different materials, it may take you more or less time :)
- Choose your materials.
Before you start the installation process, you need to choose the right type of electric fireplace for your space. There are three main types of electric fireplaces: wall-mounted, mantel, and insert. Wall-mounted fireplaces are the most popular and can be easily installed on any wall. Mantel fireplaces require a little more work as they need to be placed on a solid surface, while insert fireplaces are designed to fit into an existing fireplace or other enclosure. We chose an electric fireplace insert and created the surround for it, so the rest of this tutorial will focus on installing an electric fireplace insert.
If you install an electric fireplace insert, you will also need to choose the materials you want to finish the fireplace surround with. You could go with tile, brick (real or faux) or even a concrete fireplace finish. We chose to use Airstone for the facing of our fireplace because we wanted the look of stone, but we didn't want to spend a fortune on it OR have to work with natural stone, which is heavy and tricky because of size variations, etc. - Sketch out your design.
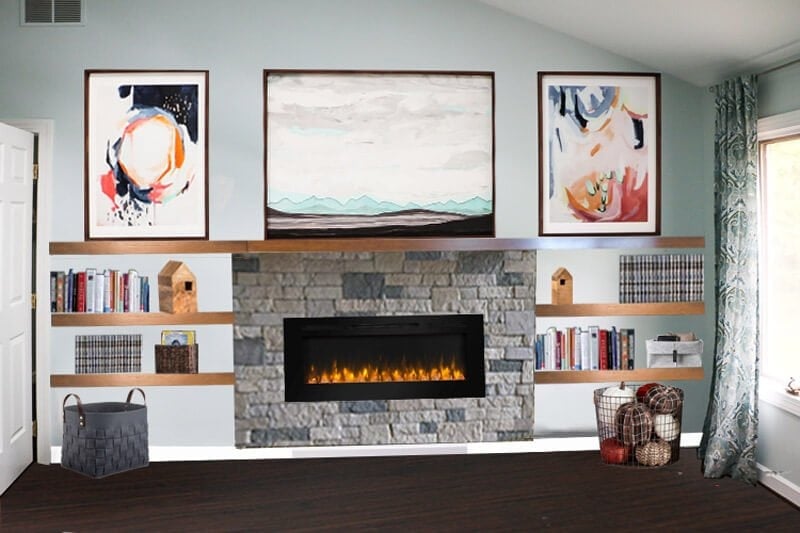
We knew we wanted to install shelves to flank our DIY fireplace on both sides, so we took that into account as I played around with different plans and layouts. This is the mockup design I came up with.

- Choose your electric fireplace insert and plan the layout.
Once we had a plan for what we wanted the space to look like, we chose this 50-inch fireplace insert. You need to choose your fireplace insert before deciding on the exact measurements of the surround or anything else. Each fireplace insert will include very specific specs and measurements for the size of the insert you choose and you have to pay careful attention to them to ensure that you build a frame that will fit it perfectly.
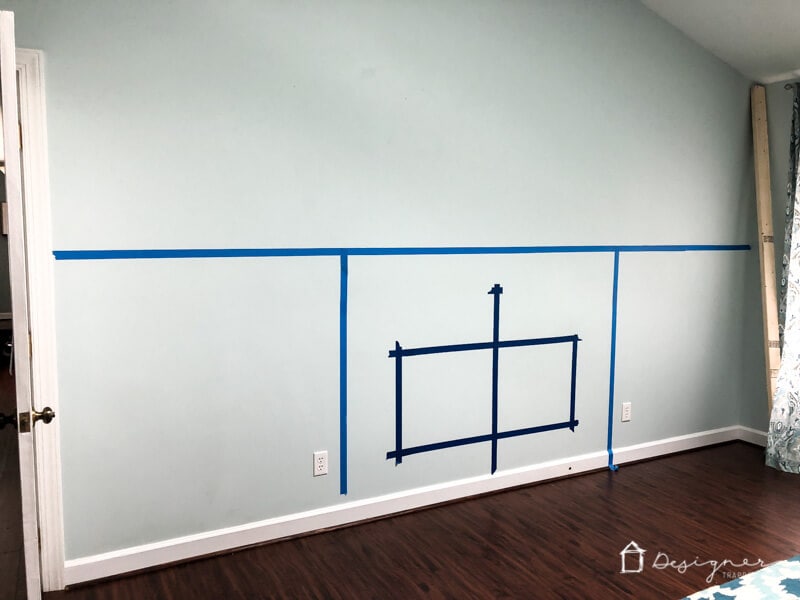
Once you choose your insert, I recommend taping everything out where you plan to install it to help you visualize everything before you make your final decisions.
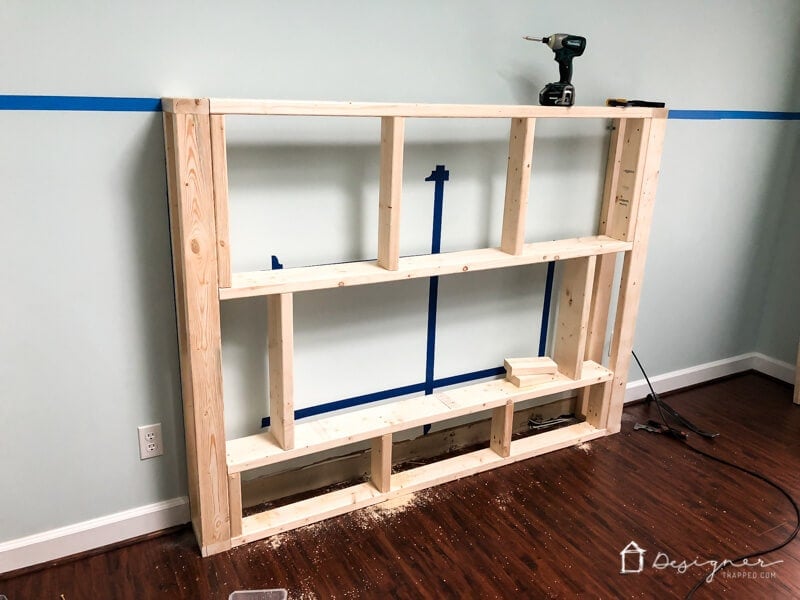
- Build a wood frame.
Once you've finalized your design and have your measurements sketched out, it's time to start building the frame. Use the measurements you took earlier to cut the pieces of wood to the correct size. Create a frame for the electric fireplace insert using 2x4s and add vertical supports to attach the moldings.
Again, the exact measurements and cuts you need to make will depend entirely upon your design and the fireplace insert you have chosen. We framed out the fireplace box to the size we wanted AND according to the clearance specs, etc. of the electric fireplace we used.
Once your frame is built, be sure to dry-fit your fireplace insert to make sure it fits correctly!
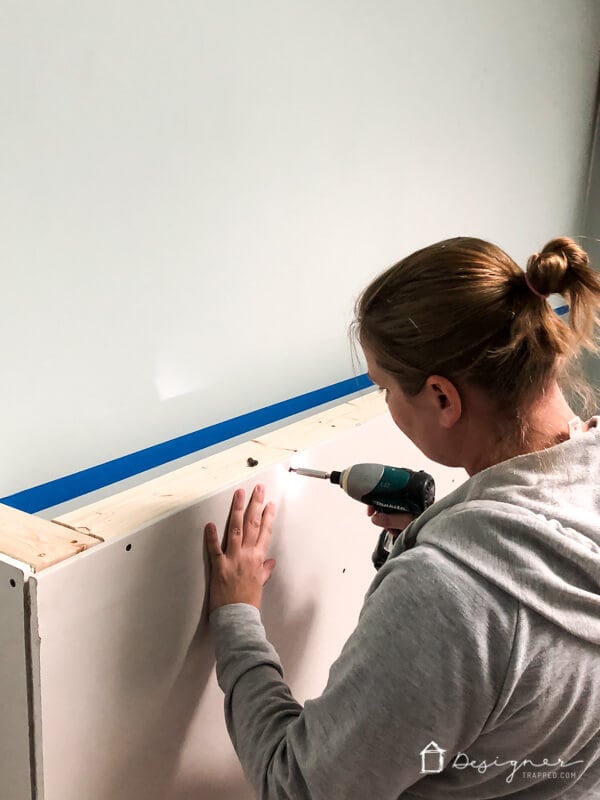
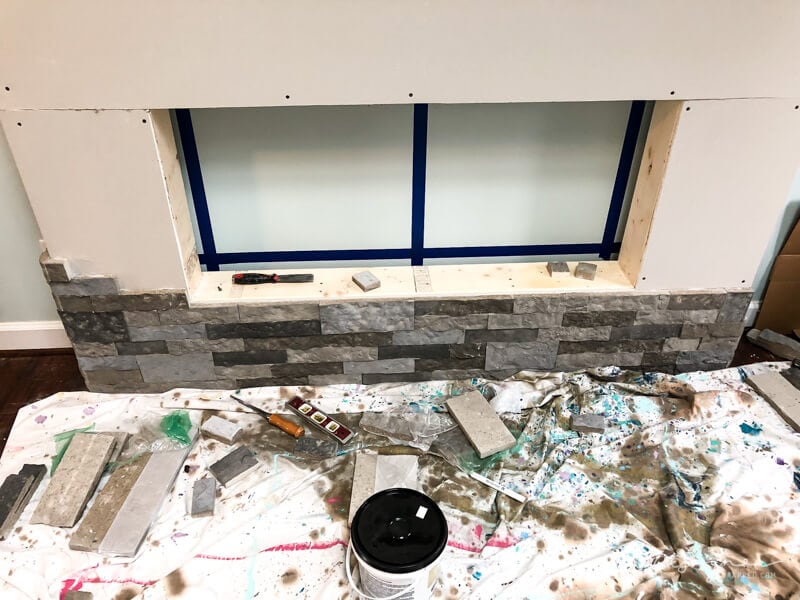
Note: As you can see in the photo below, you will need to remove any baseboard molding behind your frame to ensure the fireplace sits flat against the wall. We removed the caulk with a utility knife and then used a multi-tool to cut out that section of the baseboard. - Install your frame and enclose it.
Once we confirmed that our fireplace insert fit perfectly in the frame we built, we attached the frame to the wall and the floor. Because AirStone can be installed on drywall, we covered our entire frame with drywall.

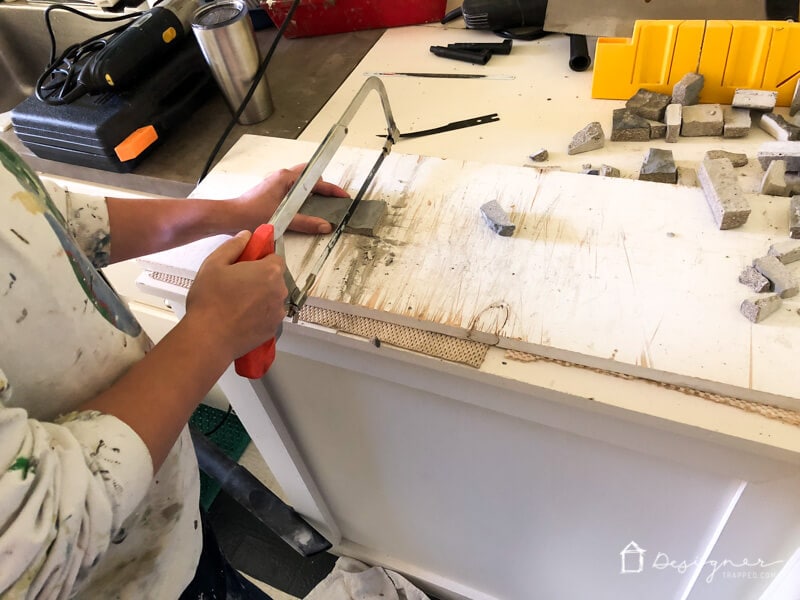
- Clad your fireplace.
Again, we chose to clad the outside of our fireplace with AirStone. All you need to install it is the pre-mixed adhesive, a putty knife to “butter” the adhesive onto the back of each piece, and a hacksaw to make your cuts. It is time-consuming but easy to install, especially because it comes with special corner pieces, so you don't have to miter anything.
- Install the fireplace insert.
Read the instructions for your particular electric fireplace insert and install it. You may choose to install it before finishing any portion of the outside. We were able to install our electric fireplace insert after the AirStone was installed and the adhesive had dried.
We left a small space on the right side of our fireplace to allow the cord to feed out to the outlet on the wall near the fireplace (see below). Once it's plugged in, fire it up (pun intended) and make sure everything is working properly.
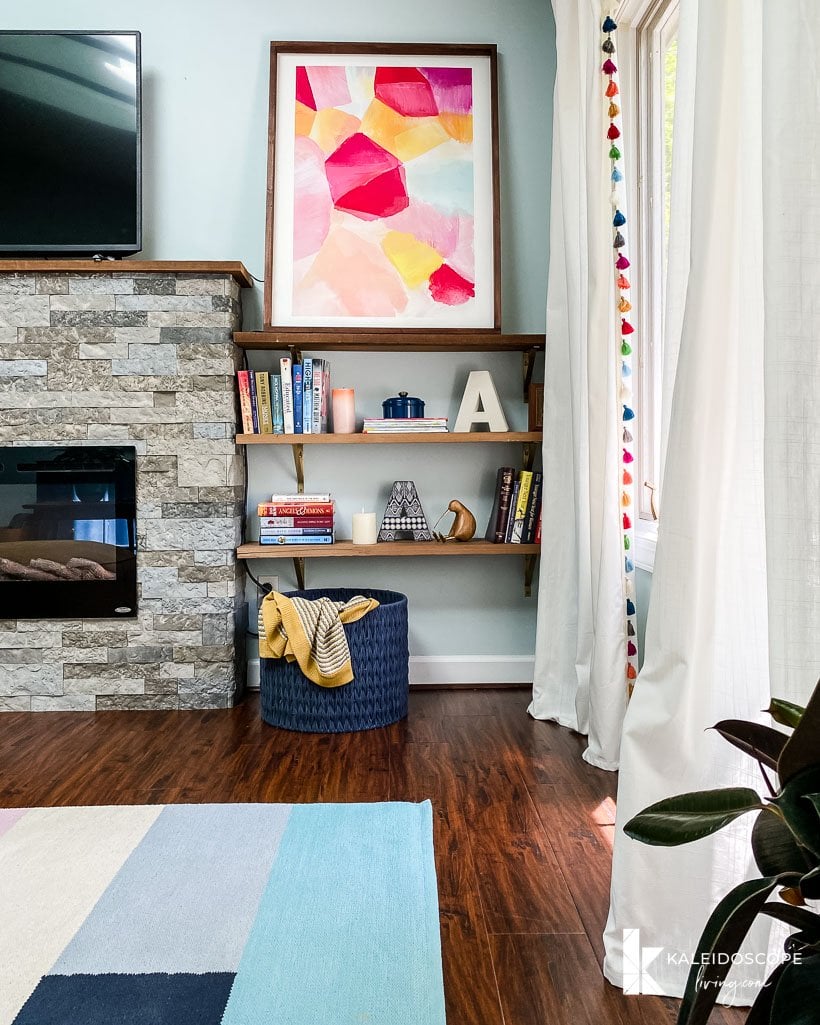
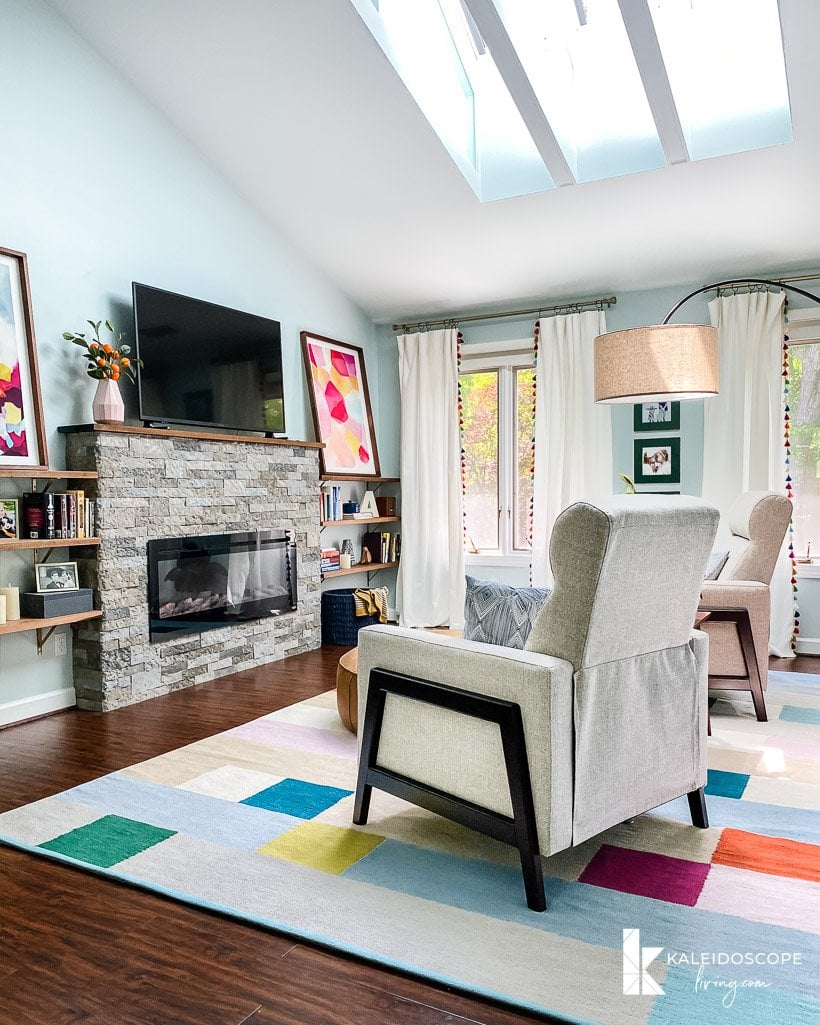
We added a simple wood mantel and made DIY shelves to flank the fireplace on both sides. Overall, it is one of the easiest DIY jobs we have tackled, especially given how HUGE the impact is in the room. We couldn't be happier with how it turned out! It absolutely warmed the space up and made it feel cozy.
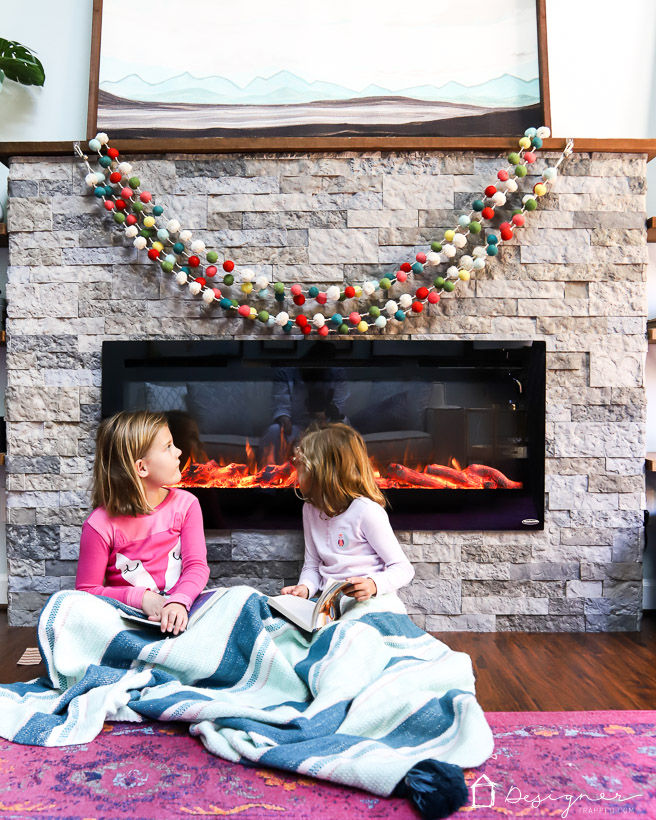
Below is a photo we took shortly after we installed it (and before we changed some other things in the space, like the rug, etc.). I love that you can turn the flames on with OR without heat. And the remote control makes it super easy to do!
Frequently Asked Questions
We knew roughly the size we wanted the finished fireplace to be, so we searched for a fireplace insert around 50 inches wide. There were a ton to choose from! We didn't know anything about particular brands or manufacturers, so we chose one with a price point we were comfortable with that had good ratings. This is the electric fireplace insert we ultimately chose. No regrets.
AirStone is an innovative, patented, ultra-light stone wall covering product that transforms a complicated construction ordeal into a simple do-it-yourself project. You can use AirStone both indoors and outdoors. The AirStone system offers the same look, feel and durability of real stone, but weighs 75% less. Last I checked, AirStone is available at most home improvement stores and even on Amazon.
AirStone is available in three color blends: Autumn Mountain, Spring Creek, and the new Birch Bluff. We were torn between Birch Bluff and Spring Creek. In the end, we chose the Spring Creek blend and are very happy with our color choice. You can check out loads of AirStone Inspiration here.
Yes, yes, yes. I was a bit skeptical of the claim that anyone can install it using only pre-mixed adhesive, a putty knife and a hacksaw. But I have to admit, it REALLY is that simple. We didn't use any special mixing tools and used our sad, old hack saw to make our cuts. And we used an old putty knife to apply the adhesive. Super easy. If you can ice a cupcake, you can apply the adhesive to the AirStone.
It is somewhat time-consuming, but we finished our entire AirStone fireplace (including the framing) in a weekend, so it's much faster than most DIY jobs, lol. And if you have ever tiled anything yourself, you will find installing AirStone MUCH easier. I laid every single tile in our twin girls' bathroom and it was miserable. Applying AirStone to our fireplace was like a walk in the park comparatively.
The pieces fit together perfectly, so as long as you start with a level line, you are good to go. The corner pieces are incredibly easy to use, thank goodness. I can't imagine trying to fit natural stone along corners.
I hope you can see that installing an electric fireplace is a fairly simple and easy project that can add comfort and style to any room in your home without spending a fortune! And it really is a DIY-friendly project that anyone can tackle with very few tools.
Wondering how I approach transforming rooms and spaces in our home? Check out Designer in a Binder®.

And if you want exclusive content and behind-the-scenes sneak peeks, be sure to subscribe before you head out!