DIY Deck Bar on a Budget
Last Updated on June 6, 2022
A deck bar will transform your backyard–learn how to build a DIY outdoor bar with this tutorial.
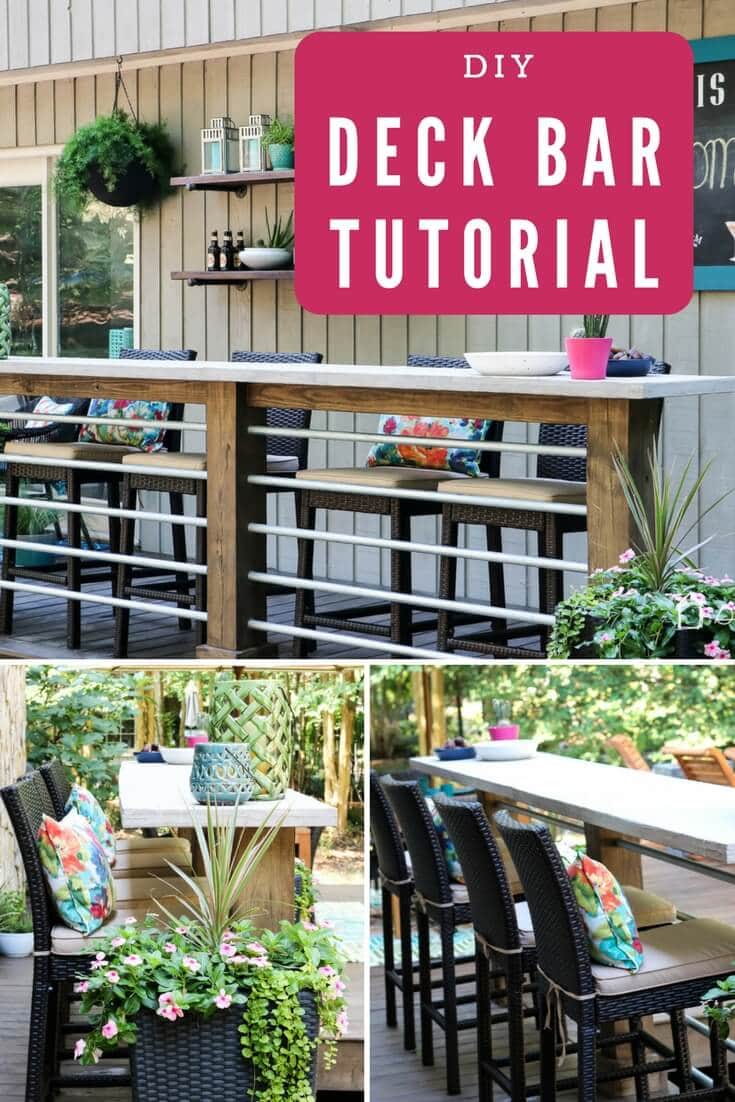
Hey friends! I hope you had a chance to check out our big DIY deck reveal yesterday. Well today I am going to share the tutorial for how to make a deck bar. It's a feature that we are so, so glad we included in our project. It requires just a few basic materials that you can find at your local home improvement store.
Thank you to DAP Products for sponsoring this post. As always, the opinions and text are all mine. This post also contains some affiliate links for your convenience (which means if you make a purchase after clicking a link I will earn a small commission which helps keep my blog up and running but it won't cost you a penny more)! Click here to read my full disclosure policy.
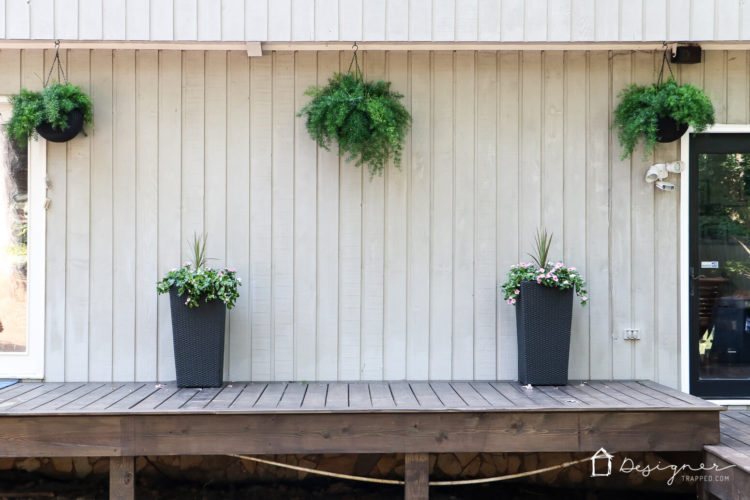
First, here's a look at the exact spot where our DIY outdoor bar sits before we got started. Just a vast expanse of nothing :)
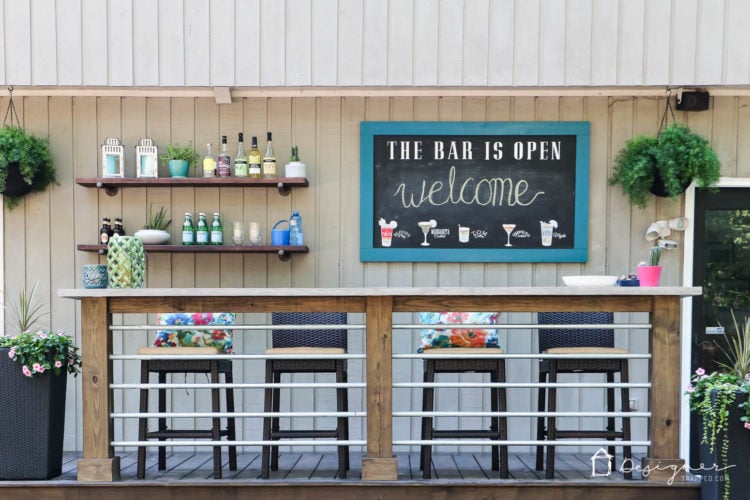
And here's what it looks like now! Read on for the full tutorial so you can build your own DIY deck bar.
DIY Deck Bar Tutorial
Materials needed
- DAP Dynagrip Heavy Duty Construction Adhesive
- 1 1/4″ Forstner bit
- 1 inch metal conduit (the amount you need will depend on the size of your bar)
- 6 x 6 inch posts (the number you need will depend on the size of your bar)
- 2 x 4s (the number you need will depend on the size of your bar)
- OSB or plywood (the size you need will depend on the size of your bar)
- NOTE: In retrospect, I really wish we had used plywood–it would have been much easier to apply to concrete overlay with a smoother base. More on that later in this post.
- Ardex Feather Finish
- Quikrete Concrete Cure And Seal
- Drywall mud pan
- 8 to 10 inch drywall taping knife
- Post brackets (these are the kind we used)
- Post level
- Deck screws
- Lag bolts
- Circular saw
- Drill driver
- Hand saw or metal grinder
- Speed square
- Deck stain (we stained all of the outdoor bar wood pieces with the same stain we used on our deck)
- DAP Plastic Wood
Steps to build the base of the DIY Deck Bar
1) First, you need to decide how long you want your DIY deck bar to be because that will impact how many posts you need. Our bar is long and we opted for 3 posts. You also need to decide how high you want your bar to sit off the ground, because that will determine the height of your posts.
2) Cut your 6 x 6 posts to length. We used a circular saw to make our cuts–we cut through one half, then flipped it over and cut through the other half.

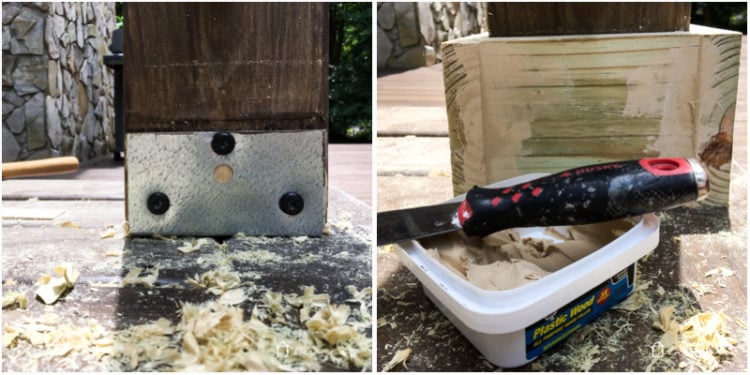
3) Decide on the spacing of your posts and mark where you need to attach your post brackets. Then attach the post brackets to your deck. Once attached, secure your posts being sure to make sure they are plumb and level.
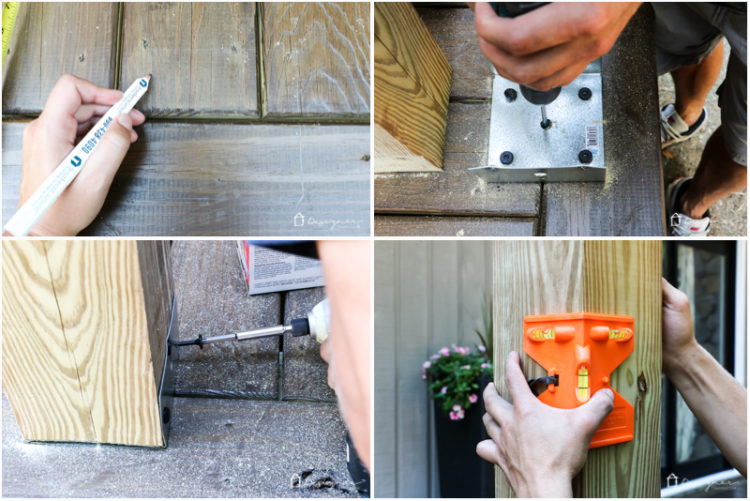

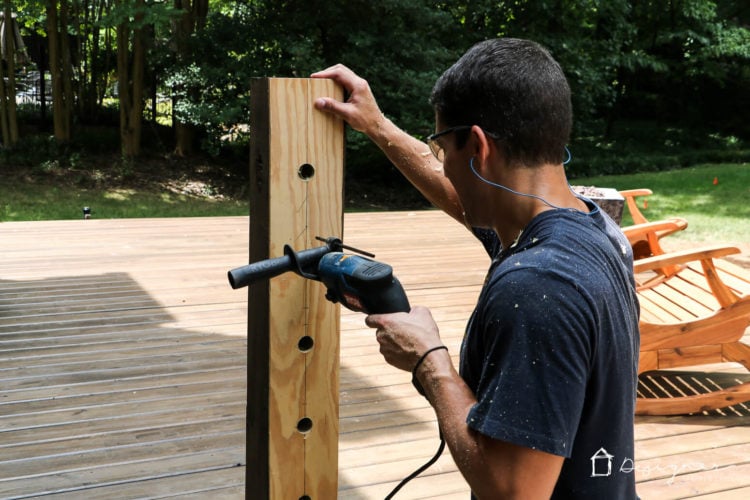
4) Decide on the spacing of your railings and drill holes to hold the metal conduit railings in your posts. We used some scrap wood to create a wood jig with our hole placement so that we could easily hold it up against each post as we drilled the holes using our 1 1/4 inch Forstner bit. It made it super easy and ensured that all of our holes were in the exact same spot on all of our posts, which ensures that the railings are perfectly level.
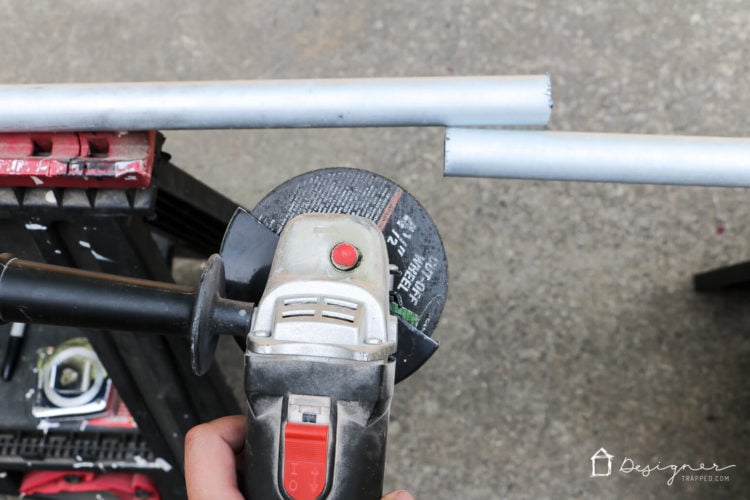
5) Determine how long your metal conduit railings need to be by measuring the distance between your posts and adding 1 1/2 inches to your measurement (you need some length to fit securely in the holes you will be drilling in the posts). Then cut them to length. You can use a hand saw or a metal grinder to cut them.
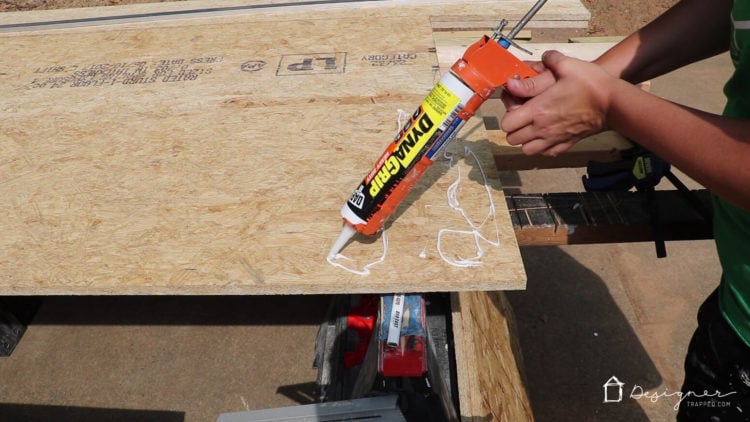
6) Place the railings into the holes. In order to do this, you will actually need to remove the end posts. Then insert one end of the conduit into the center post (which should remain attached to the deck) and reposition the corresponding end post, inserting the conduit into as you do. Repeat on both sides. If you want your railings to be completely stationary and not spin at all, use some DAP Dynagrip Heavy Duty inside each hole as you insert the conduit.
7) Attach 2 x 4s, cut to length, between each post. Be sure the top of the 2 x 4 is flush with the top of your posts. These 2 x 4s will help support the weight of the bar top.
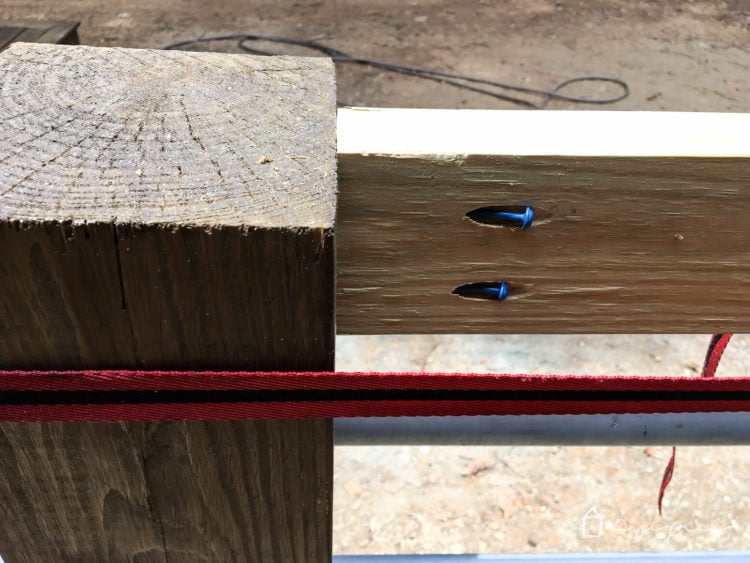
7) We trimmed out the base of each using leftover decking (we ripped off the rounded edges with our table saw). This is optional, but we did it to hide the post brackets. We used simple butt joints and used DAP Plastic Wood to fill the gaps. It was easy to sand everything smooth once the filler dried and it accepted our deck stain beautifully.
Steps to make the top of the DIY Deck Bar
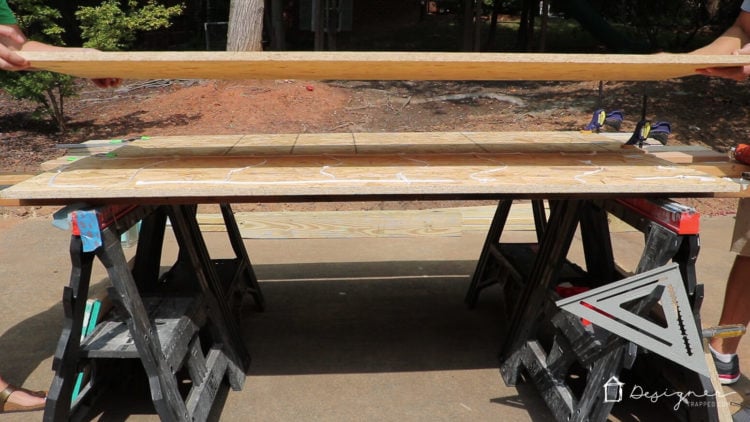
1) We started by cutting 4 sheets of OSB down to size. Our bar top was too long to make from a single sheet, so we wanted to create 2 pieces that would be joined in the middle, directly over the middle post. Because the OSB is not as thick as we wanted it, we sandwiched 2 pieces on top of each other to create a thicker profile. If I could do it over again, I would have used a thick plywood to create the top! It would have been worth the extra money–the OSB was a bit tricky to apply the concrete to and having two pieces sandwiched together made it much harder to create a smooth edge.
2) After cutting our OSB to size, we applied DAP Dynagrip Heavy Duty to the bottom piece and then put the to piece into place. We let it cure according to the directions on the tube.
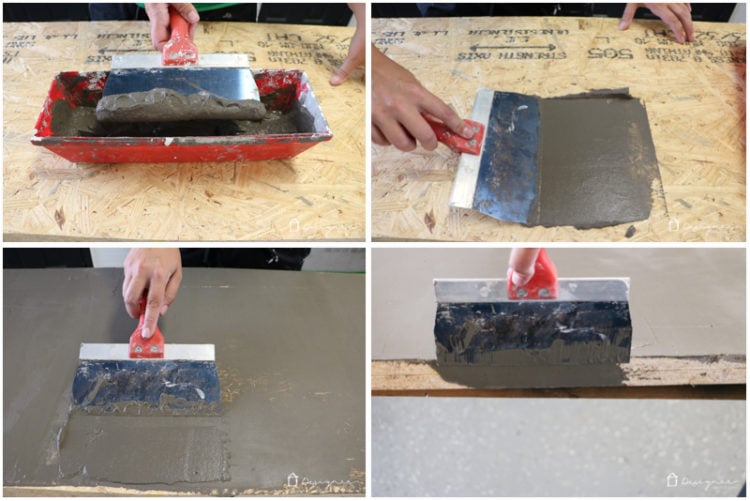
3) Regardless of whether you use OSB or plywood, the next step is the same. You want to apply the concrete overlay. You can read about how to apply the concrete overlay in this post (you do NOT need to sand before you get started–you can pick up with step #3 in that post). You can see photos of me using the same method on the OSB for our deck bar top below. I applied a total of 4 coats. Each coat moves quickly, I promise. The first coat takes a while to dry, but the remaining coats dry really quickly.
4) Once your concrete is dry, apply a sealer to the bottom of the bar top BEFORE you attach it to the posts. I recommend using a water-based acrylic concrete sealer in satin finish (this is the exact sealer we used). It gives your concrete a nice, smooth finish with a slight sheen. When you apply the sealer, it will have a milky appearance, but it dries clear. Follow the directions carefully–do not apply the sealer too thick and/or leave puddles. Also be sure to smooth out any air bubbles. I applied two coats.

5) After the sealer on the bottom of the bar top is dry, apply DAP Dynagrip Heavy Duty to the top of each post and position your bar top piece(s) on top of it. You can use clamps to hold it in place while the construction adhesive cures, but we didn't find that to be necessary–the bar top was heavy enough on its own and DAP Dynagrip Heavy Duty has exceptional instant grab :) You do NOT want to drive screws through the top to attach it because that will cause the concrete to crack! You need a construction adhesive, and DAP Dynagrip Heavy Duty is our favorite one.
6) If your bar top is so long that you need to apply 2 pieces to create the total length (like we did), you may want to apply a final coat of the concrete to the top of the bar once both pieces are in place to cover the center seam where the two pieces meet in the middle. That's what we did, but it's not crucial.
7) Apply three coats of sealer to the top and edges of your bar top.
That's it! I love this concrete overlay option for the bar top because it gives us the look of concrete that we love, but it is not impossibly heavy. We contemplated pouring a slab, but I'm glad we didn't. I think we would have needed additional posts to support the weight. BUT NOTE, YOUR BAR TOP MAY HAVE SOME SPOTS THAT DARKEN WHEN IT IS EXPOSED TO RAIN! It's almost impossible to perfectly seal this top because of the joints and seams. The spots dry out the next time a sunny day rolls around, so it doesn't bother us, but if you are a total perfectionist, you may be better off with a concrete slab. We also don't think this bar top will last 20 years, but it was such an inexpensive option, it won't bother us to have to replace it at some point.
Sooooo, what do you think? Isn't it cool?! Take a look at our DIY deck bar all finished.
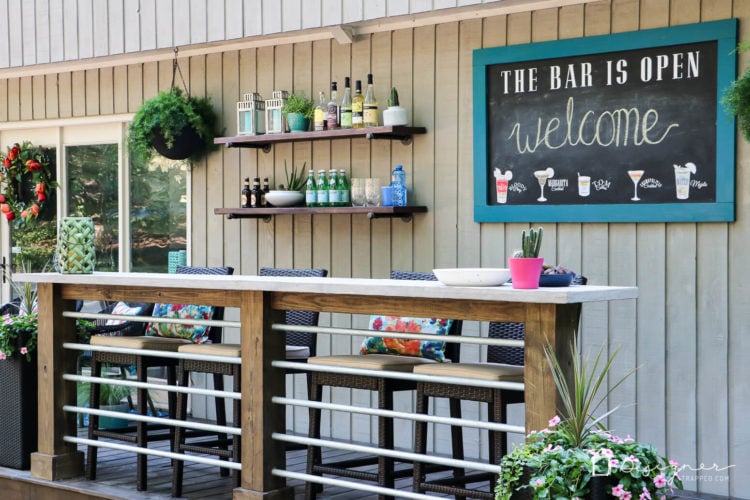
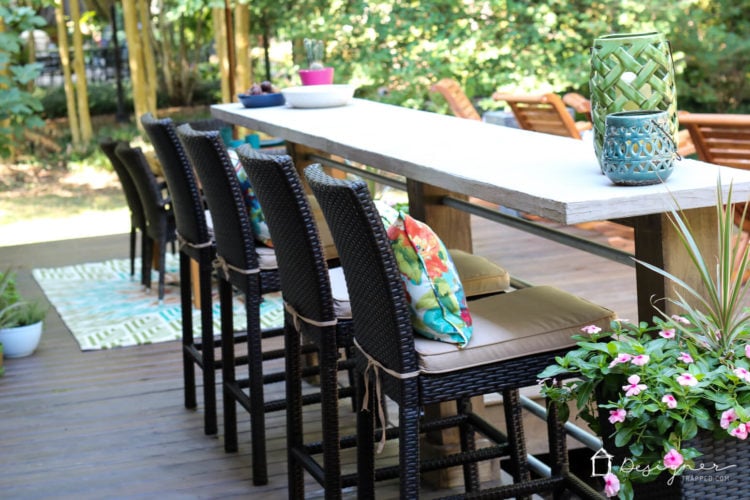
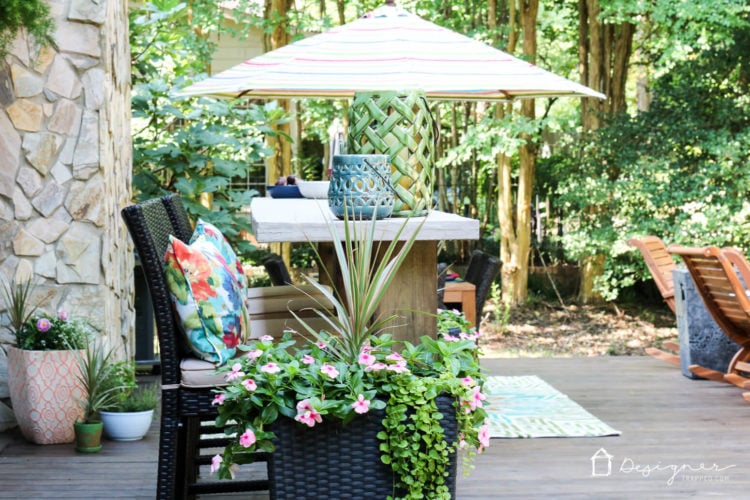
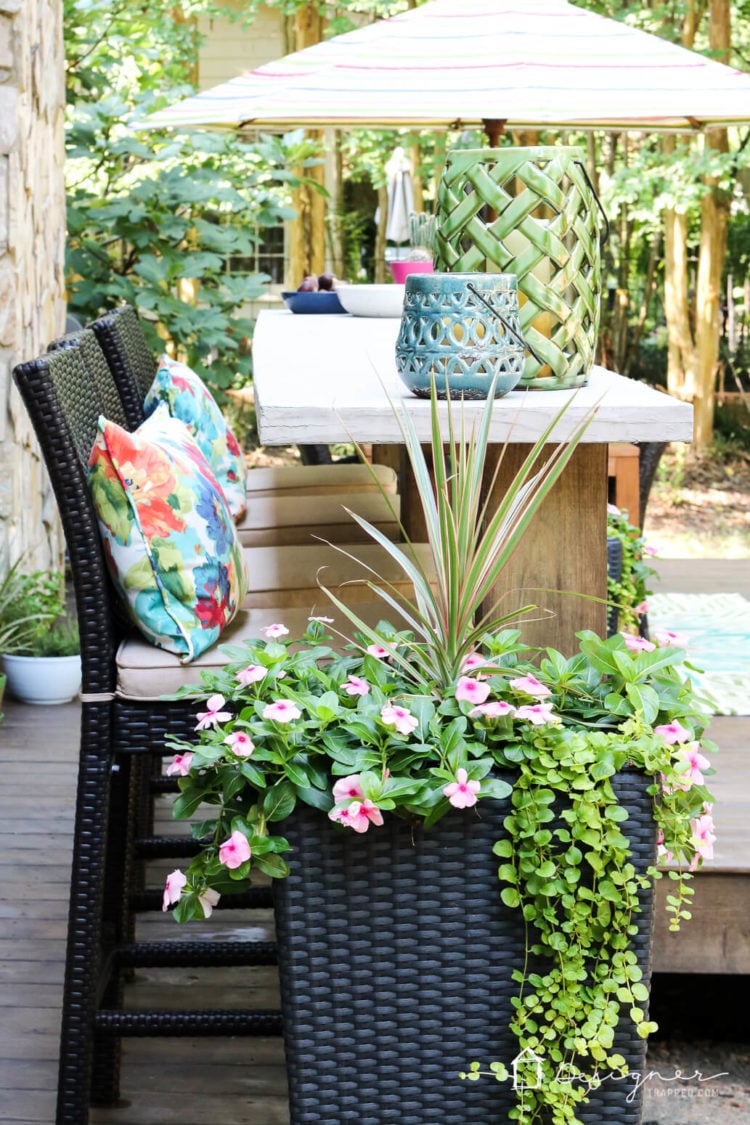
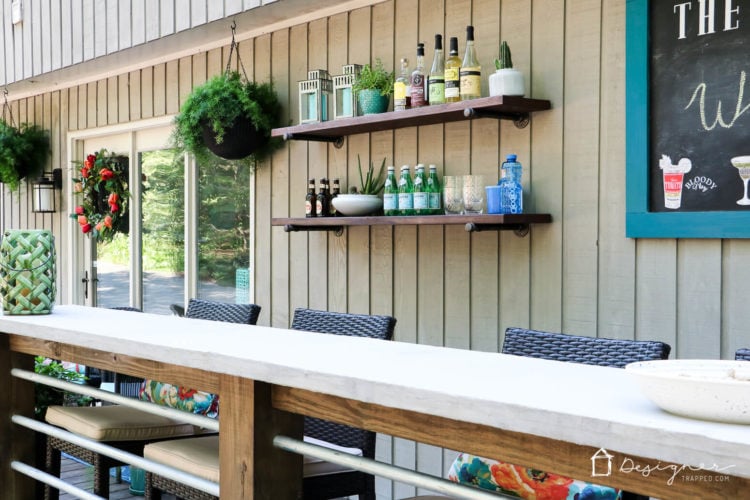
We are so, so happy with how it turned out! And you can check out the rest of our deck makeover/reveal in this post! And if you love this DIY outdoor bar project, be sure to save it to Pinterest or share it on Facebook so you can find it again later :)
Other posts you may enjoy:
- DIY Fire Pit Ideas + Buying Options for Non-DIYers
- Curated for You: Outdoor Decor Ideas
- Screened-In Porch Reveal & Outdoor Decorating Tips
- How to Make an Outdoor Chandelier
- DIY Utility Box Cover that Opens Easily
Wondering how I approach transforming rooms and spaces in our home? Check out Designer in a Binder®.

And if you want exclusive content and behind-the-scenes sneak peeks, be sure to subscribe before you head out!