Colorful & Easy DIY Christmas Ornaments
Make your own DIY Christmas ornaments with this easy, affordable and gorgeous method! It creates a colorful marbling effect, but no skill or experience is required. They are simple enough for kids to make and they make wonderful gifts!
I could not be more excited about the tutorial for these colorful and fun DIY Christmas ornaments. This is one of those projects that I didn't have high expectations for.
I saw some plastic ornaments on sale for 70% off the already low price and bought them, not really knowing exactly what I would do with them. At the same time, I bought some colorful acrylic paints, thinking maybe I would paint the ornaments.
The next day, my girls were “bored” (don't get me started on that) and I asked if they wanted to paint ornaments. They said yes and now this is one of my favorite crafty DIYs ever. Best of all, these make wonderful gifts and are super affordable.
This post contains some affiliate links for your convenience. Click here to read my full disclosure policy.
DIY Colorful, Marbled Christmas Ornaments Tutorial
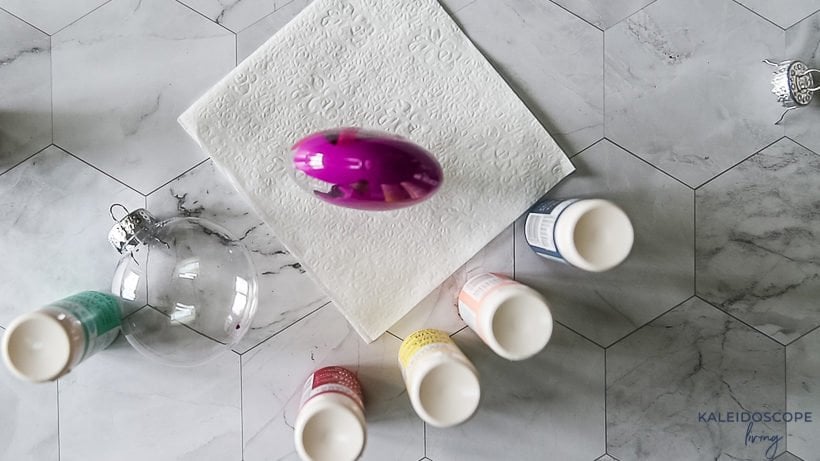
Materials needed:
- Inexpensive plastic ornaments (like these)–you can probably find them at The Dollar Store or even craft stores on major sale!
- Acrylic paints in whatever colors you like–this is a great project for using old paint that you already have!
- Paper towels or napkins
Steps:
For an overview of this project, I highly recommend you watch the short video below. You'll find the step-by-step written instructions below the video.
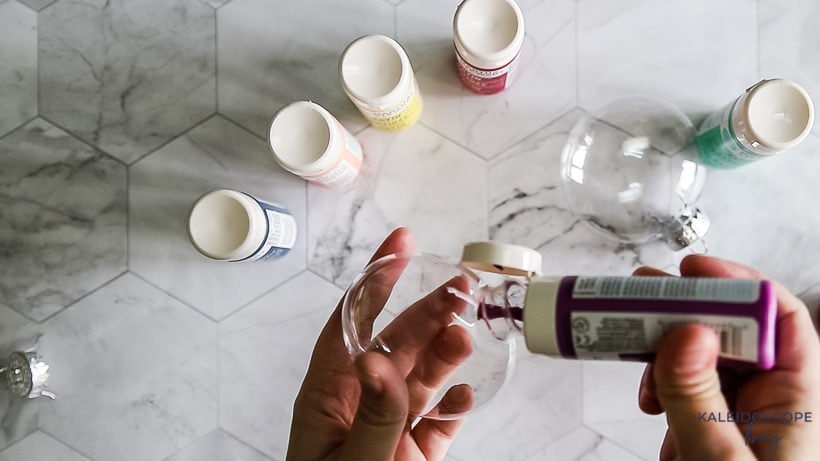
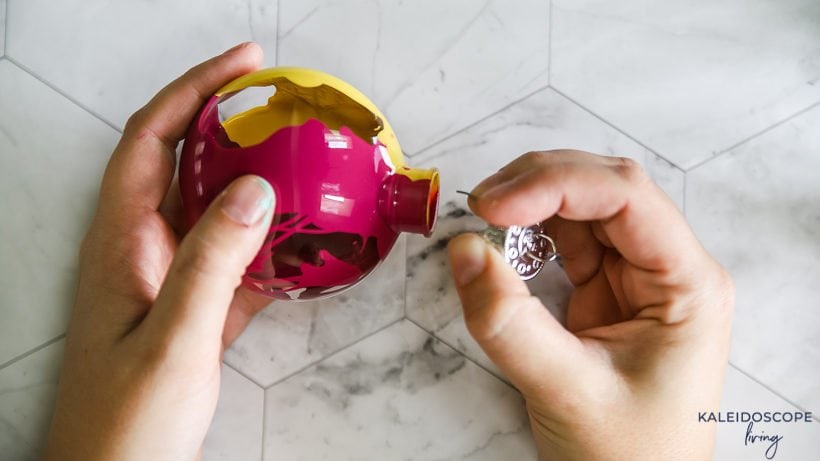
1) Remove the ornament hanger from the top of your plastic ornament and set it aside.
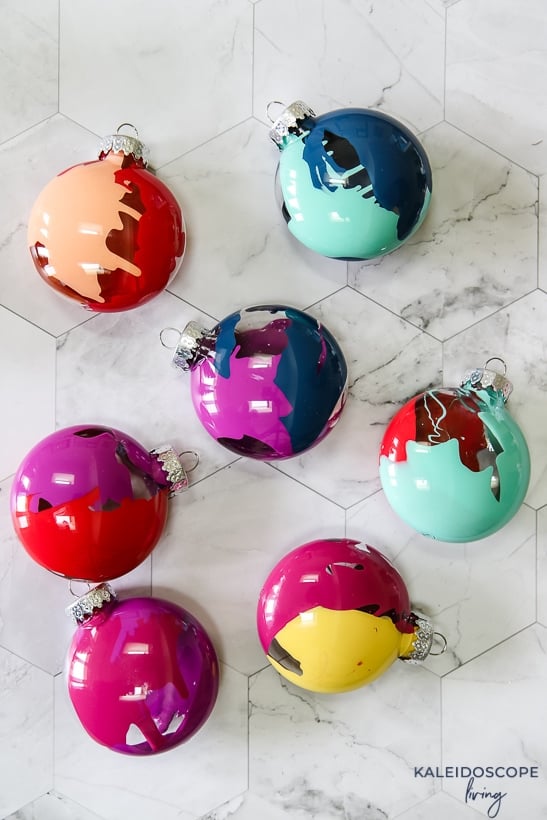
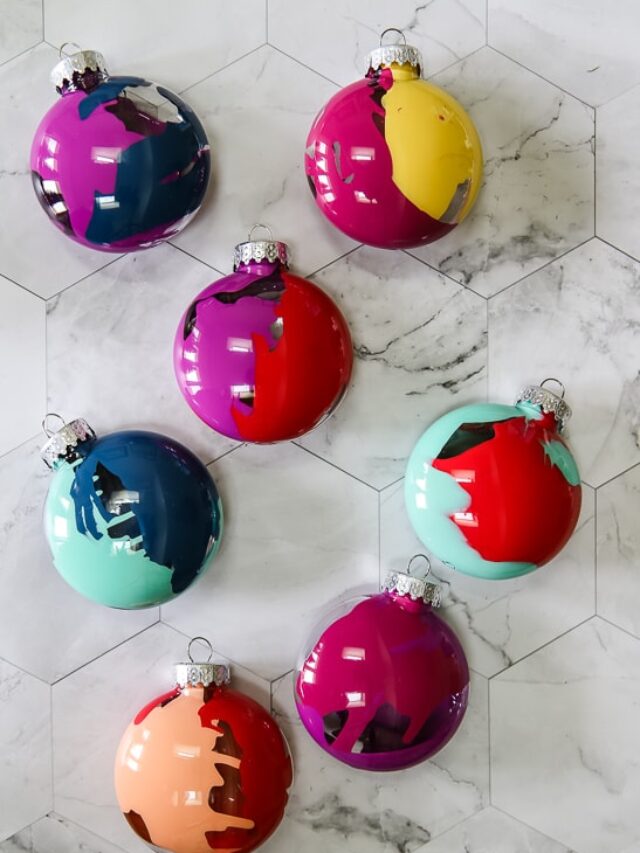
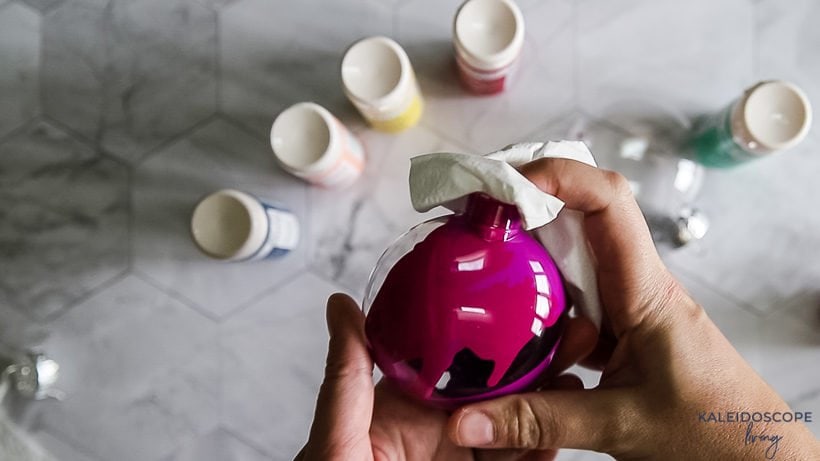
2) You will use 2 different colors for each ornament. Squirt a bit of your first paint color into your ornament.
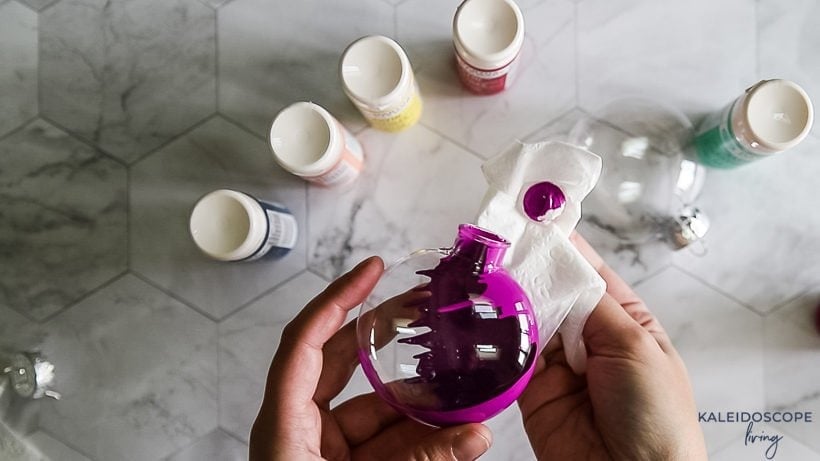
3) Cover the opening with a napkin or paper towel. Then shake, bang, etc. your ornament around until you like the pattern that the paint makes inside the ornament.
4) Repeat with your second color. I recommend squirting the second color in an area that your first color didn't cover. You want minimal mixing of the wet paints–if they mix too much, you'll wind up with muddy paint colors. Then repeat your shaking, banging routine until you like the finished look.
5) Set it upside down on a paper towel to dry overnight.
6) Once the paint is dry, replace your ornament hanger.
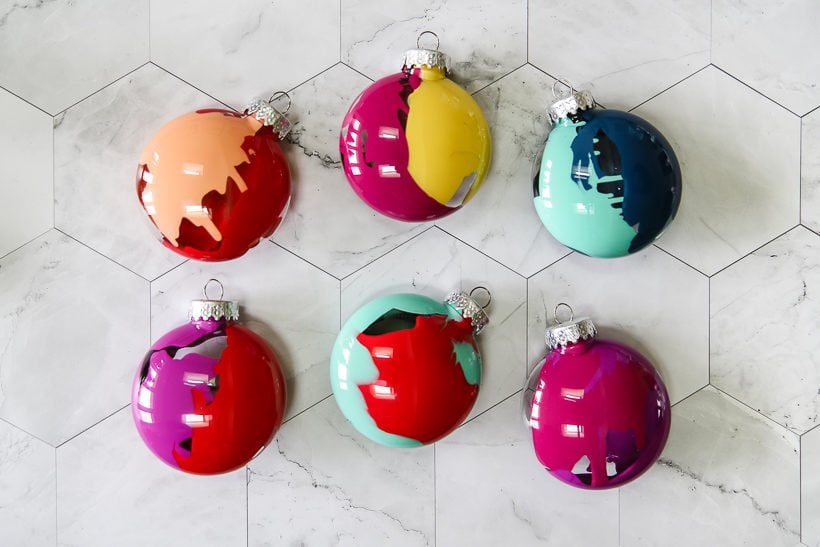
That's it! Aren't they just gorgeous? And I love that there is literally an endless possibility of colors you could use. I already plan to buy up as many of these ornaments as possible during Christmas clearance sales so we can make more!
Wondering how I approach transforming rooms and spaces in our home? Check out Designer in a Binder®.

And if you want exclusive content and behind-the-scenes sneak peeks, be sure to subscribe before you head out!