How to Make a Pillow Cover With a Zipper
Being able to create custom pillows for your home is such a great way to bring color, pattern and interest into a space. And it's easier than you think to make a pillow cover with a zipper. Learn how with this step-by-step tutorial!
This guest post was contributed by Jen from Fresh Crush.
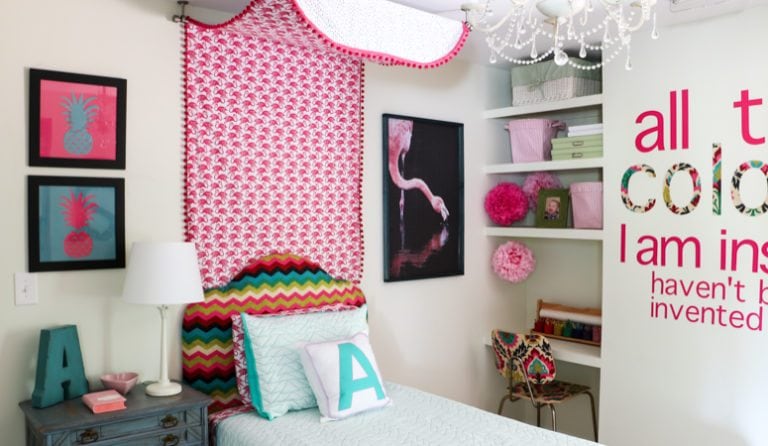
Hi! I'm Jen from Fresh Crush and I'm thrilled to share this tutorial on Kaleidoscope Living today! I made these zippered pillow covers for my daughter's bedroom. Making a pillow cover with a zipper sounds complicated, but it really isn't! I promise. You do not need expert sewing skills to make one yourself.
This post contains affiliate links for your convenience. Click here for my full disclosure policy.
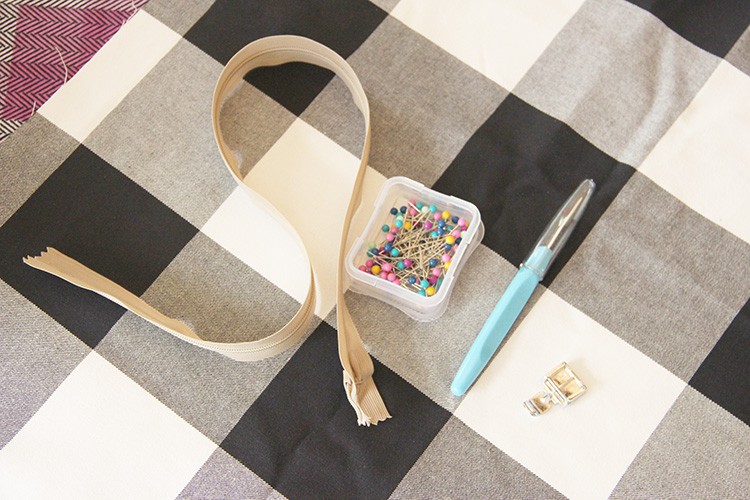
Supplies Needed for 1 Zippered Pillow Cover
- 2 coordinating fabrics
- Tasha's favorite place to order fabric is Spoonflower –the selection is incredible!
- A down-filled pillow form – IKEA has the best price for these, but if you don't live near one, Amazon has some great deals too)
- Zipper in a color that coordinates with your fabrics
- Straight pins
- Seam Ripper
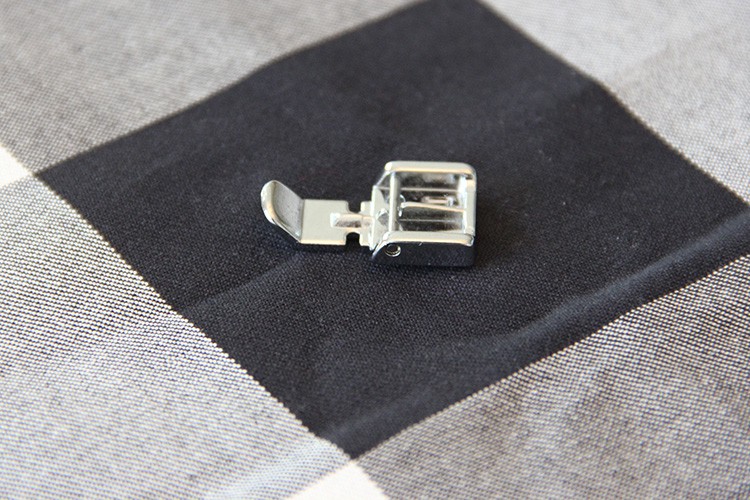
- Zipper Foot
- Sewing Machine (this is the current version of Tasha's sewing machine that she LOVES)
Step-by-Step Tutorial for Making a Pillow Cover With a Zipper
Time needed: 1 hour
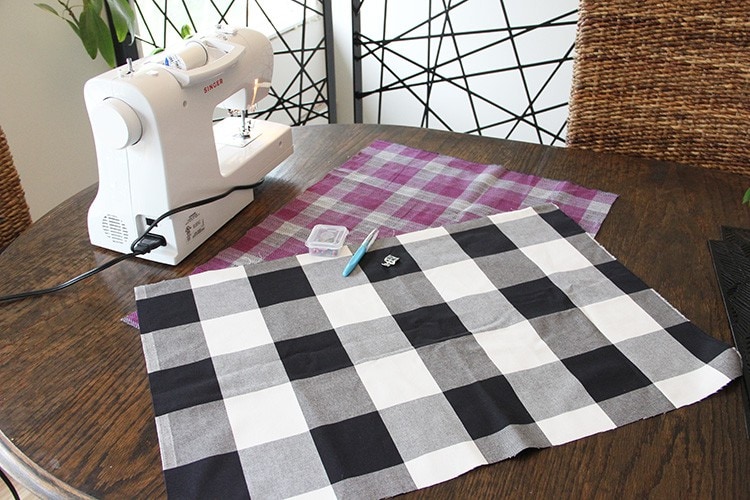
- Choose your fabrics.
Before you start your project, you should select two fabrics that coordinate with each other and that work well with the rest of the decor in the space you will be using them. Consider using a heavier fabric like cotton or canvas for a sturdier, more structured pillow. Choose a lighter, breathable fabric like linen or silk for a softer, more comfortable pillow. If you struggle with mixing patterns, you could use the same fabric on both sides, but I love using two different fabrics so I can flip them around if I want to! FYI, how to mix patterns is something Tasha explains wonderfully in Designer in a Binder.
- Choose your pillow form and measure it.
My personal preference is to work with down-filled pillow forms — they are great for getting that crisp karate-chop shape when styling your space. I found mine at IKEA for a very reasonable price. I like to measure my fabric to the exact size of my pillow form, and then add 1 inch (on all sides) for seam allowance.
- Cut your fabric.
Using a ruler and a pair of fabric scissors, measure and cut both pieces of fabric to the size of your desired pillow. Be sure to add an inch to the length and width for seam allowances.

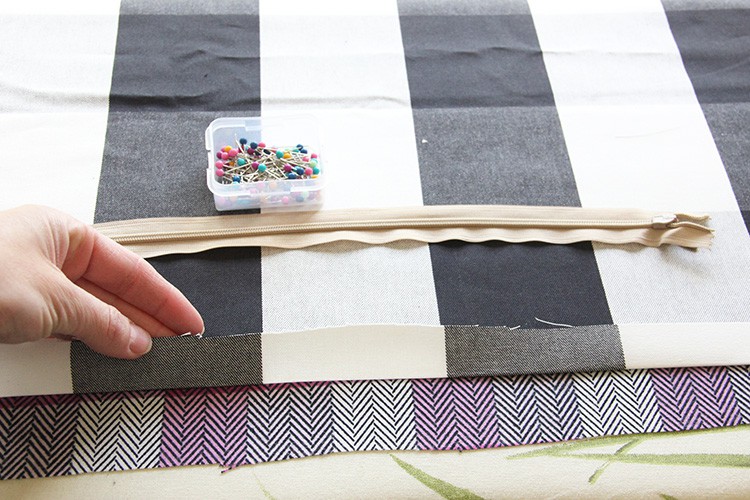
- Prepare your zipper.
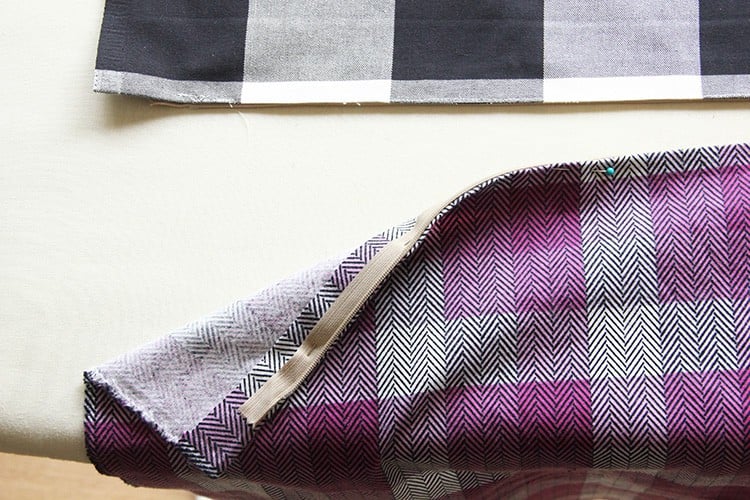
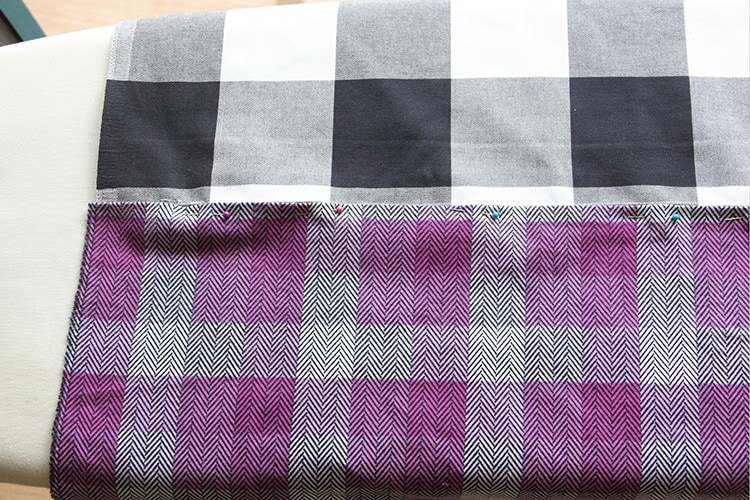
Take one piece of your fabric and on the edge you would like to attach your zipper, press the seam allowance up onto the wrong side of the fabric (or to the inside of your pillow).
Then pin your zipper in place. Center, and line up the edge of your pressed fabric with one side of your zipper. The fabric fold should just kiss the actual zipper. Pin to the wrong side of the pressed fabric with the zipper facing down. This will put the right side of the zipper, with the right side of your fabric. - Attach the zipper foot to your sewing machine.
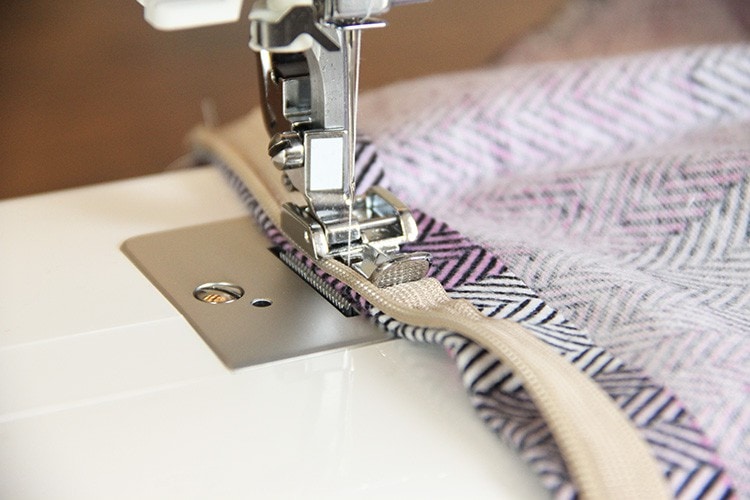
This is a zipper foot and it is really important when you are learning how to make a pillow with a zipper. I had recently purchased my Singer sewing machine and it came with one, and admittedly I had never used one before. But have no fear, if you've never worked with a zipper foot before, it is your friend! I absolutely love working with it and I will never go back. When we get a little further along, you'll see it in action and why I love it so much.
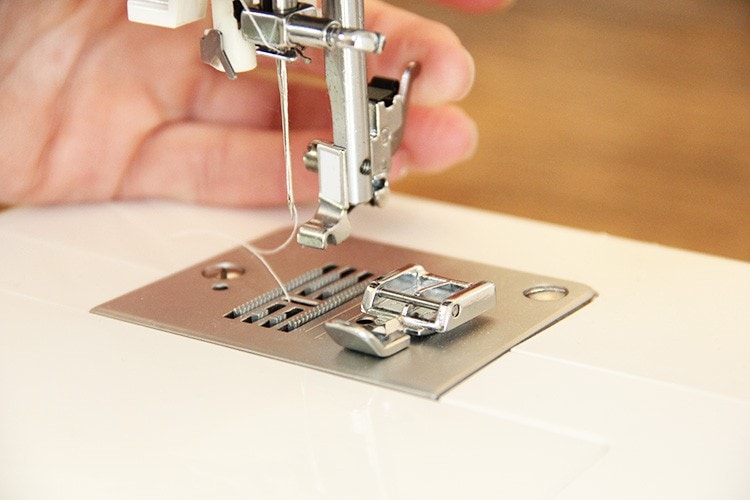
Attach your zipper foot to your sewing machine. On my particular sewing machine, there is a little arm at the back of the machine that releases a little hook that grabs and holds the bar on the zipper foot and holds it in place. You can choose to have it on the right or left side depending on which direction you're sewing on your project. - Sew your zipper in place.
Line up your pinned zipper and fabric with the zipper OPEN. You'll notice the unzipped zipper slides right underneath the zipper foot allowing you to stitch immediately beside it with no fear of accidentally stitching over your zipper. Stitch the length of your first pillow edge to hold the zipper in place.
- Prepare your opposite piece of fabric in the same way, with the pressed seam allowance.
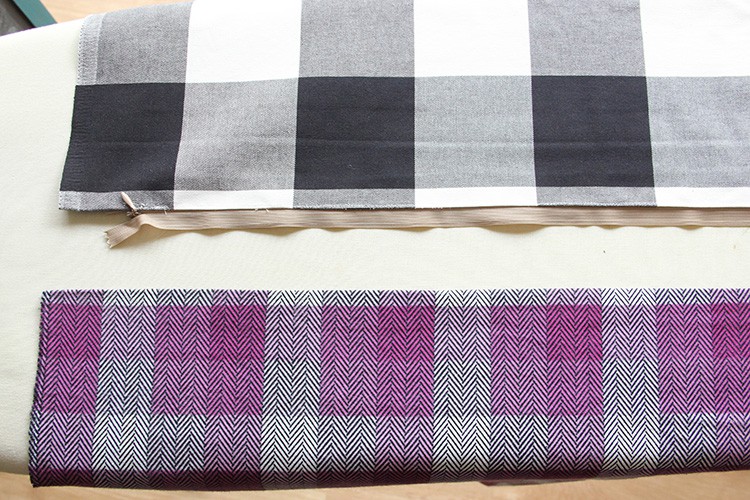
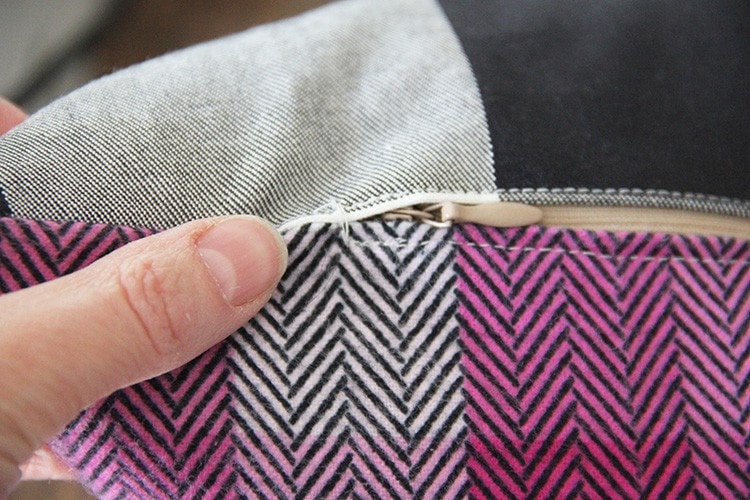
Now you should have something that looks a bit like the photo below. This is the view from above of the two “right sides” of fabric showing, with the zipper attached to the first side, right side facing up.
- Zip up the zipper.
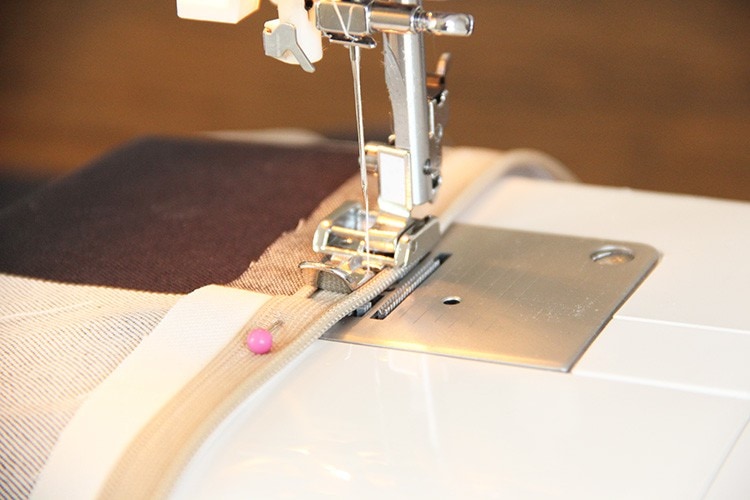
Take your second piece of fabric and butt the pressed seam up against the first piece of fabric already attached to the zipper. Pin in place.
- Sew the other half of your zipper in place.
Unzip the zipper again. Switch your zipper foot to the other side, and sew this side of the zipper in place, just as you did the first side.
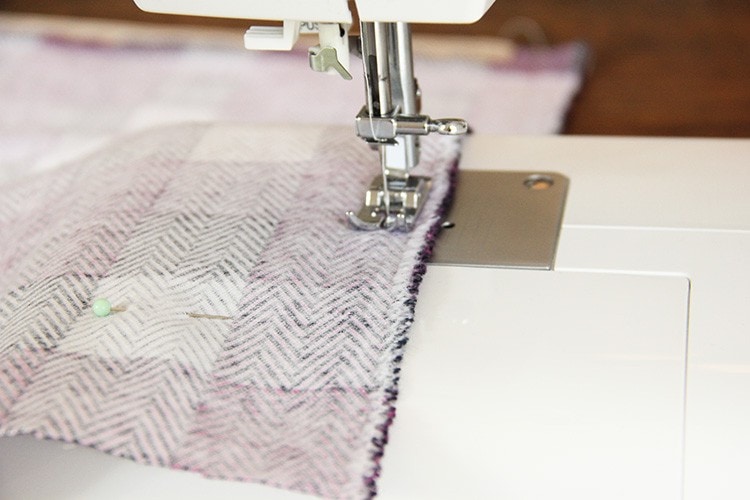
- Prepare your seam allowance on the remaining 3 sides of your pillow.
Flip your fabrics right-side to right-side. You should now be looking at both the wrong side of your fabrics and the wrong side of your zipper. Double check your pillow form measurements, and transfer those measurements to your pillow. You have one completed edge, so you only need seam allowance on three sides. Pin along your sewing line on three sides.
- Sew the three edges of your pillow together.
Sew along the three remaining edges, with your zipper opened slightly.
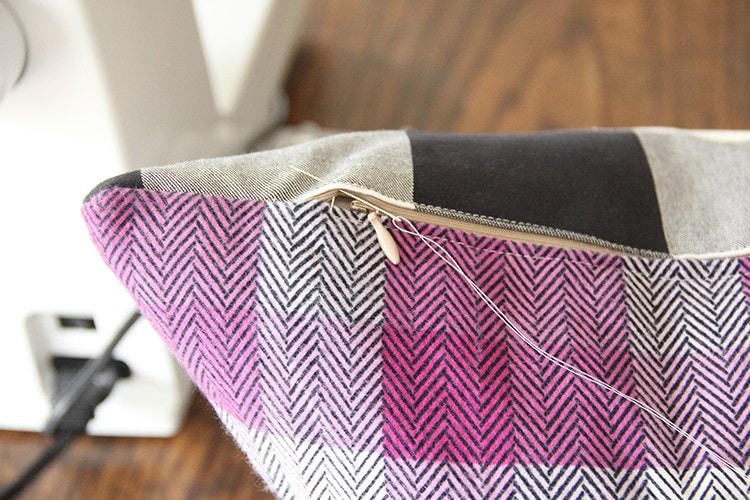
- Add your pillow insert and do a tiny bit of hand stitching.
When you're done sewing, trim as needed. Now, unzip your finished pillow case and flip it right-side out. Add your pillow insert and hand stitch across your two sides just beyond the top and bottom of your zipper to add durability and avoid any gaps that may have occurred between the edge of the actual zipper and the tape it is attached to.

You're done! Now you know how to make a pillow cover with a zipper! When you break it down step-by-step, it really isn't hard! I am a total beginner when sewing zippered pillow covers, so if I can do it, I know you can too!
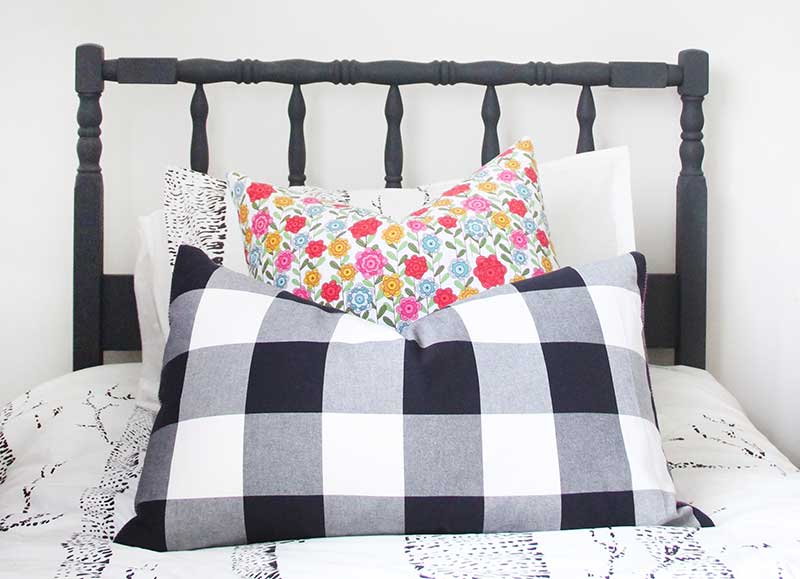
Here's how my pillow covers turned out :)
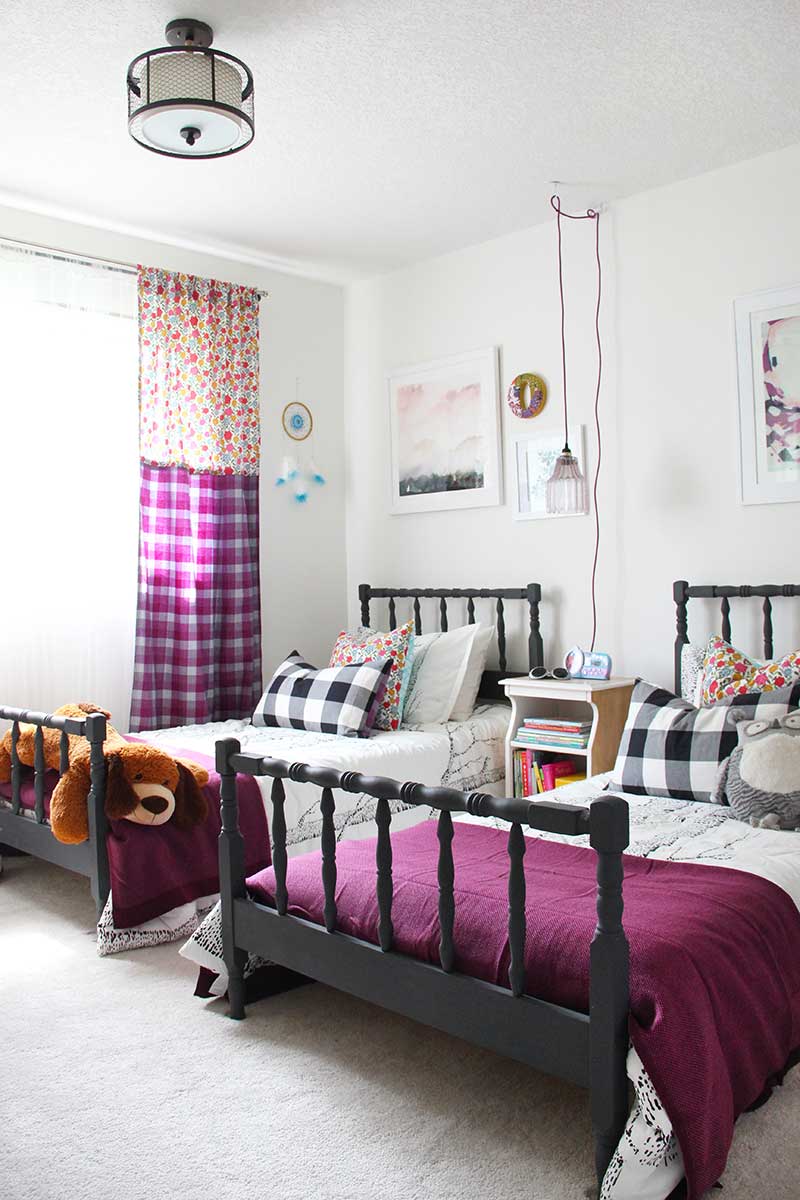
I made a total of four zippered pillows for my daughters room this way, and they were all a success, and they're holding up great with everything my five-year-old puts them through… forts… hopping lily pads… pillow fights… it's all good!
Making all the pillows two-sided totally opens you up to being able to switch the feeling of your decor at a simple flip of the pillow. So much bang for your buck when you're putting all that work into making a beautiful pillow anyway, right?
I hope you an now see that by following these simple steps, you can create a beautiful throw pillow that is easy to take off and wash whenever you want! Once you’ve made your first pillow cover with a zipper, you can experiment with different fabrics and designs to make your own unique statement pieces for every room in your house!
If you liked this project, you might also like to check my other projects over at Fresh Crush!
Thank you so much to Jen for this wonderful tutorial!
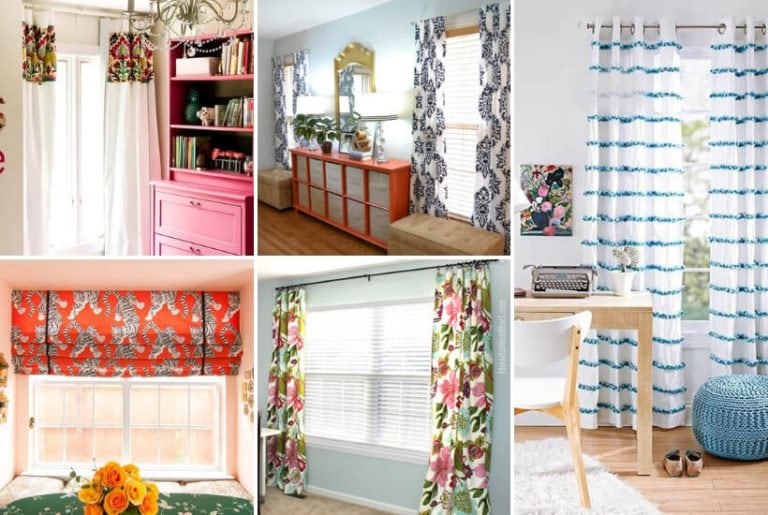
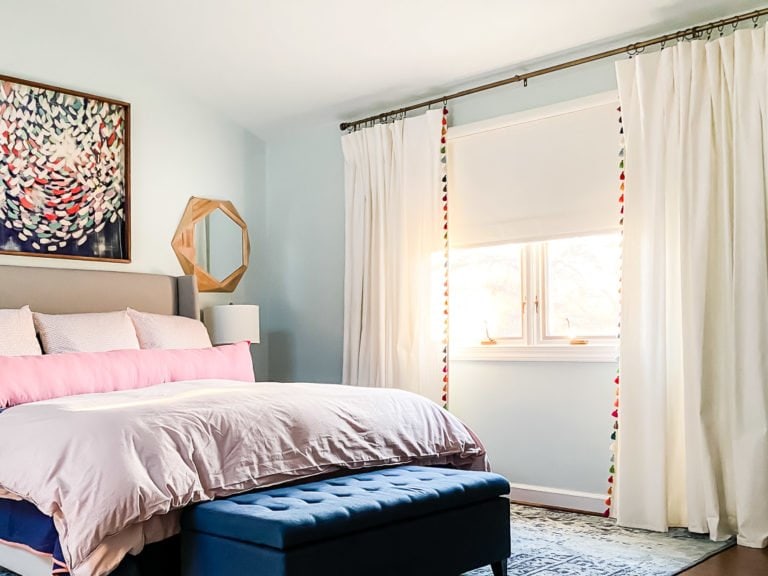
More TEXTILE Posts

Wondering how I approach transforming rooms and spaces in our home? Check out Designer in a Binder®.

And if you want exclusive content and behind-the-scenes sneak peeks, be sure to subscribe before you head out!

Can’t wait to try to make some pillows using this tutorial!
Wondering where the twin beds are from?
Thank you!
The contributor bought them at a thrift store.